

7 Creative Epoxy Resin Project Ideas for DIY Artists
- Nima
- Jan 2
- 10 min read

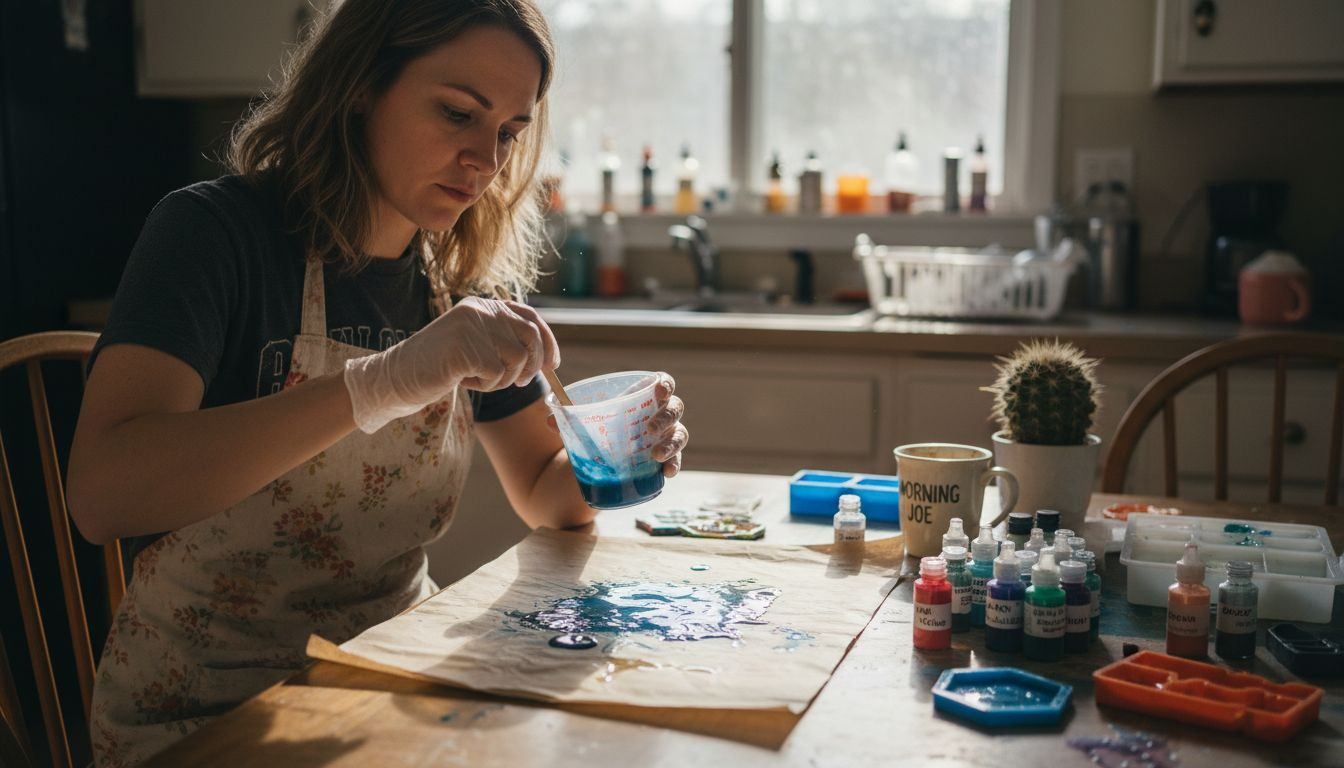
Over 60 percent of American and Canadian craft hobbyists say that trying new epoxy resin projects significantly sparks their creativity. Whether you are a seasoned resin artist or just starting your DIY journey, finding fresh inspiration is key to keeping your work exciting and unique. This guide explores innovative resin ideas that help you stand out, impress customers, and elevate your craft with dynamic new techniques.
Table of Contents
Quick Summary
Takeaway | Explanation |
1. Start with basic supplies. | Gather clear epoxy resin, silicone molds, color pigments, and optional embellishments to begin crafting resin art. |
2. Experiment with color techniques. | Use complementary colors and layering to create mesmerizing effects in resin pieces like coasters and jewelry. |
3. Consider safety precautions. | Always work in a well-ventilated area and use gloves to protect yourself while handling resin. |
4. Personalize your projects. | Incorporate meaningful objects or themes in your designs to add a personal touch to your artistic creations. |
5. Focus on surface preparation. | Ensure your base is clean and level to achieve optimal adhesion and a flawless finish for resin tabletops. |
1. Custom Resin Coasters With Vibrant Color Effects
Creating custom resin coasters is an exciting way to transform ordinary surfaces into stunning works of art that showcase your creativity and personal style. With vibrant color techniques from professional resin artists, you can design unique coasters that become conversation pieces in any home.
The magic of resin coasters lies in their versatility. By using specialized pigments, mica powders, and strategic pouring techniques, you can achieve mesmerizing visual effects that range from galaxy inspired swirls to oceanic wave patterns. Each coaster becomes a miniature canvas where color and technique combine to create something truly extraordinary.
To get started, you will need basic supplies including clear epoxy resin, silicone molds, color pigments, and optional embellishments like metallic powders or glitter. The process involves carefully mixing your resin, adding color, and pouring it into molds with precision. Experiment with layering techniques, creating depth by pouring colors at different stages of the curing process.
When selecting colors, consider complementary palettes that work well together. Metallic and pearlescent tones can add incredible shimmer and dimension to your coasters. Blue and teal tones can create oceanic effects, while deep purples and blacks can produce stunning galaxy inspired designs.
Pro tip: Always work in a well ventilated area and use protective gloves when mixing and pouring resin to ensure a safe and enjoyable crafting experience.
2. DIY Epoxy Resin Jewelry for Unique Accessories
DIY epoxy resin jewelry allows artists to transform simple materials into wearable art pieces that reflect personal creativity and style. Creating handmade jewelry provides an exciting opportunity to design accessories that are completely unique and tailored to your aesthetic.
The process of making resin jewelry involves several key steps that blend artistic technique with careful craftsmanship. You will need clear epoxy resin, silicone molds, color pigments, and optional embellishments like metallic flakes or dried flowers. The magic happens when you carefully mix resin components and introduce vibrant colors or decorative elements that capture light and imagination.
Pendants and earrings are particularly popular starting points for resin jewelry makers. By experimenting with layering techniques and color combinations, you can create stunning pieces that range from translucent marble effects to bold geometric designs. Some artists embed small objects like glitter, botanical elements, or meaningful trinkets to personalize their jewelry.
Working with resin requires patience and precision. Always measure your resin and hardener components exactly as recommended to ensure proper curing and durability. Temperature and mixing technique play crucial roles in achieving a smooth professional finish that will showcase your artistic vision.
Pro tip: Invest in high quality silicone molds with intricate designs and use a toothpick to carefully remove tiny air bubbles for a flawless resin jewelry piece.
3. Decorative Serving Trays With Embedded Objects
Designing decorative serving trays with embedded objects transforms ordinary kitchenware into extraordinary art pieces that tell a unique visual story. Creative resin tray designs offer an exciting way to personalize your home decor while showcasing artistic creativity.
Epoxy resin trays provide incredible versatility for artists looking to combine functionality with aesthetic appeal. You can embed a wide range of objects into your tray surface including dried flowers, metallic flakes, photographs, or even small meaningful trinkets that create a personal narrative. The transparent nature of resin allows these embedded elements to appear suspended within the tray creating a stunning three dimensional effect.
The process of creating these trays involves careful preparation and precise technique. Begin by selecting a silicone mold that matches your desired tray shape and size. Carefully mix your epoxy resin according to manufacturer instructions ensuring proper ratio between resin and hardener. Layer your chosen embedded objects strategically placing them to create visual interest and balance within the design.
Color selection plays a crucial role in the final appearance of your tray. Metallic pigments can add depth and shimmer while transparent colors create subtle ethereal effects. Consider the overall color palette of your home decor when selecting pigments to ensure your tray complements existing design elements.
Pro tip: Use a heat gun on low setting to gently remove tiny air bubbles from your resin surface for a crystal clear professional finish.
4. One-of-a-Kind Resin Wall Art Techniques
Resin wall art represents an extraordinary medium for transforming blank spaces into stunning visual narratives that capture imagination and personal creativity. Advanced resin art techniques offer artists unprecedented opportunities to create unique wall pieces that reflect individual artistic vision.
The magic of resin wall art lies in its incredible versatility and depth. Unlike traditional painting methods, resin allows you to build multilayered compositions with remarkable three dimensional effects. Artists can incorporate various materials like metallic powders, dried botanicals, and pigments to create complex visual landscapes that seem to shift and change depending on lighting and viewing angle.
Successful resin wall art requires understanding fundamental techniques such as color mixing, pouring strategies, and bubble elimination. Begin by selecting a smooth substrate like wood panel or canvas that can support resin weight. Experiment with different pouring techniques like dirty pour, swipe method, or intentional layering to create dynamic visual compositions that draw viewers into the artwork.
Color selection plays a critical role in achieving professional results. Consider using complementary and contrasting pigments that create visual tension and interest. Metallic and pearlescent additives can introduce stunning depth and shimmer that transforms your wall art from ordinary to extraordinary.
Pro tip: Always work in a temperature controlled environment around 70 to 75 degrees Fahrenheit to ensure optimal resin curing and prevent unwanted surface imperfections.
5. Personalized Keychains Using Silicone Molds
Resin keychains offer a perfect blend of creativity and functionality allowing artists to craft personalized accessories that showcase individual style and imagination. Custom keychain creation techniques provide an exciting opportunity to transform simple materials into meaningful everyday objects.
The process of making resin keychains involves selecting the right silicone molds and understanding basic epoxy resin mixing principles. Artists can experiment with various embedding techniques including glitter effects, dried flower inclusions, and multilayered color designs. Each keychain becomes a miniature canvas where personal creativity can truly shine through unique visual compositions.
To begin your keychain project select silicone molds with interesting shapes that complement your design vision. Consider geometric forms round shapes or more intricate designs that offer visual complexity. When mixing resin pay close attention to precise measurements and mixing techniques to ensure a clear bubble free finish that highlights your embedded elements.
Personalization is key when creating resin keychains. You can incorporate meaningful small objects like tiny photographs miniature charms or colorful pigments that reflect personal memories or aesthetic preferences. Metallic powders and pearlescent additives can introduce stunning depth and shimmer transforming an ordinary keychain into a wearable piece of art.
Pro tip: Use a toothpick to carefully position and adjust small embedded objects before the resin begins to cure to achieve perfect placement and prevent unwanted shifting.
6. Durable Resin Tabletops and Countertops
Epoxy resin offers an extraordinary solution for creating stunning and incredibly resilient surfaces that can transform ordinary furniture into extraordinary design statements. Professional tabletop coating techniques provide artists and DIY enthusiasts with the ability to craft surfaces that are both visually captivating and exceptionally functional.
The key to successful resin tabletops lies in meticulous surface preparation and understanding the unique properties of epoxy. Before pouring resin, thoroughly clean and level your base surface ensuring it is completely free from dust, oils, and imperfections. Different materials like wood, concrete, and metal require specific preparation techniques to achieve optimal adhesion and a flawless final finish.
Resin tabletops offer remarkable advantages beyond traditional surfaces. Their incredible durability means resistance to scratches, heat, and moisture making them ideal for high traffic areas like kitchen counters or dining tables. Artists can incorporate stunning visual elements like embedded objects metallic pigments or layered color effects that transform an ordinary surface into a true work of art.
When selecting epoxy for tabletops consider factors like curing time viscosity and UV resistance. Thick pour epoxy formulations work best for creating substantial surfaces with deep visual dimensions. Experiment with techniques like river table designs or multilayered color effects to create truly unique furniture pieces that reflect your personal artistic vision.
Pro tip: Use a heat gun on low setting to gently eliminate tiny air bubbles during the initial pouring stage to ensure a crystal clear professional grade surface.
7. Creative Resin Bookmarks for Gift Giving
Resin bookmarks represent an innovative and personalized gift idea that transforms ordinary reading accessories into stunning works of art. Creative resin bookmark techniques allow artists to craft unique gifts that are both functional and visually captivating.
The process of creating resin bookmarks involves selecting high quality clear casting resin and exploring various artistic techniques. Artists can incorporate botanical elements like pressed flowers dried leaves or small decorative objects to create multilayered visual compositions. Metallic powders and translucent pigments enable stunning color effects that catch light and draw attention.
To craft a memorable bookmark begin by selecting a silicone mold with an appropriate shape and size. Carefully mix your resin components ensuring precise measurements and minimal air bubbles. Consider embedding meaningful items like tiny photographs small charms or colorful glitter to create a personal narrative within the bookmark design. Each piece becomes a miniature canvas showcasing your artistic vision.
Bookmarks make exceptional gifts because they combine practicality with artistic expression. By varying colors techniques and embedded elements you can create bookmarks that speak directly to the recipient interests or personality. Seasonal themes like autumn leaves winter snowflakes or spring blossoms can add an extra layer of thoughtfulness to your handmade gift.
Pro tip: Use a toothpick to carefully position delicate embedded elements and remove tiny air bubbles before the resin begins to cure to ensure a crystal clear professional finish.
Creative Project | Description | Key Features and Tips |
Custom Resin Coasters | Design and create resin coasters with personalized vibrant effects. | Use varied pigments and pouring techniques to achieve effects like galaxies and ocean waves. Ensure workspace ventilation and wear protective gloves. |
Epoxy Resin Jewelry | Craft unique accessories such as pendants and earrings using resin. | Use high-quality molds, experiment with layering colors and objects, ensure precise resin-to-hardener ratio, and eliminate air bubbles using a toothpick. |
Decorative Serving Trays | Embed objects like dried flowers or metallic flakes in resin trays. | Select appropriate molds, layer embedded objects for visual balance, and use colors that complement your decor. Utilize a heat gun to minimize air bubbles. |
Resin Wall Art | Create multi-layered, three-dimensional compositions on wall panels. | Learn pouring techniques, use complementary colors, and maintain optimal room temperature for curing (70-75°F). |
Personalized Keychains | Make keychains by embedding items like glitter or photographs in resin. | Use creative molds and consider personal mementos for embedding. Position small items before curing. |
Durable Resin Tabletops | Craft functional and artistic resin-based surfaces like countertops. | Clean base surface thoroughly, use thick-pour epoxies, and choose finishes with high durability for a scratch and moisture-resistant result. |
Creative Resin Bookmarks | Design unique bookmarks with resin and embedded elements for gifting. | Select thematic objects for embedding, use metallic powders for accents, and ensure proper arrangement before curing. |
Unlock Your Creativity with Premium Resin Supplies from Krystal Resin
The article “7 Creative Epoxy Resin Project Ideas for DIY Artists” highlights the challenges artists face in mastering techniques like vibrant color effects, bubble elimination, and precise layering to create stunning resin projects. Whether you are crafting custom resin coasters, decorative trays, or one-of-a-kind jewelry, having access to high-quality resin products and tools is essential to bring your artistic vision to life without frustration.
At Krystal Resin, we understand the importance of reliable materials and expert guidance for your resin art journey. Our extensive selection of clear epoxy resin, color pigments, and specialized molds empowers you to achieve flawless finishes with ease. You no longer have to worry about curing issues or surface imperfections because every product is designed for consistent results and durability. Plus, with our efficient shipping options—including direct shipping from a US warehouse—your supplies arrive quickly so you can start your next project right away.
Elevate your resin art creation today by exploring our carefully curated collection of resin products at Krystal Resin. Take the next step to transform your ideas into dazzling DIY masterpieces that impress and inspire. Shop now and experience the perfect combination of quality, convenience, and customer satisfaction.
Frequently Asked Questions
What materials do I need to start my first epoxy resin project?
To begin your first epoxy resin project, gather clear epoxy resin, silicone molds, color pigments, and any optional embellishments like glitter or dried flowers. Ensure you also have disposable cups for mixing, stirring sticks, and protective gloves to keep your workspace safe.
How do I ensure a bubble-free finish in my epoxy resin art?
To achieve a bubble-free finish, mix your resin components slowly and thoroughly, which minimizes air inclusion. Use a heat gun or a torch lightly over the surface after pouring to help bubbles rise and pop, ensuring a smooth, professional look.
Can I create multiple layers in my epoxy resin projects?
Yes, you can create multiple layers in your epoxy resin projects by allowing each layer to cure partially before adding the next one. Aim for a curing time that allows the previous layer to be tacky but not fully set, typically around 4-6 hours, depending on your resin’s specifications.
What safety precautions should I take when working with epoxy resin?
Working with epoxy resin requires several safety precautions: always use gloves to protect your skin, work in a well-ventilated area to avoid inhaling fumes, and consider wearing a respirator if you’re sensitive to chemicals. Ensure you have proper equipment like goggles and an apron for further protection.
How can I personalize my epoxy resin projects?
To personalize your epoxy resin projects, incorporate unique elements like small photos, meaningful symbols, or specific color palettes that resonate with your style. Think about combining items that reflect personal memories or aesthetics, allowing your art to tell your story.
Recommended
Comments