

Master the Resin Colorant Application Process for Art
- Nima
- Feb 3
- 8 min read

Finding the right approach for using colorants in your resin art can be challenging, especially when vibrant results hinge on careful technique and preparation. For many American resin artists, building creativity starts with a well-organized, ventilated workspace and high-quality supplies. This guide shows how precise measurement, systematic mixing, and smart colorant choices from Krystal Resin lead to flawless finishes and stunning effects in your craft projects, while keeping your process safe and consistent.
Table of Contents
Quick Summary
Key Point | Explanation |
1. Prepare your workspace meticulously | A clean, organized, and ventilated area is crucial for achieving high-quality resin art. Protect surfaces and streamline access to materials. |
2. Measure resin components accurately | Use a digital scale to ensure precise ratios of resin to hardener, following manufacturer’s instructions to avoid curing issues. |
3. Choose suitable colorants wisely | Selecting the right type of colorant greatly impacts the visual effect. Experiment with various options for desired transparency and vibrancy. |
4. Blend carefully for even pigmentation | Master the art of mixing colorants gently to prevent air bubbles while achieving uniform color distribution throughout the resin. |
5. Test color intensity before application | Conduct small test samples to evaluate color under different lighting, making adjustments as necessary to achieve the desired effect. |
Step 1: Prepare Your Workspace and Materials
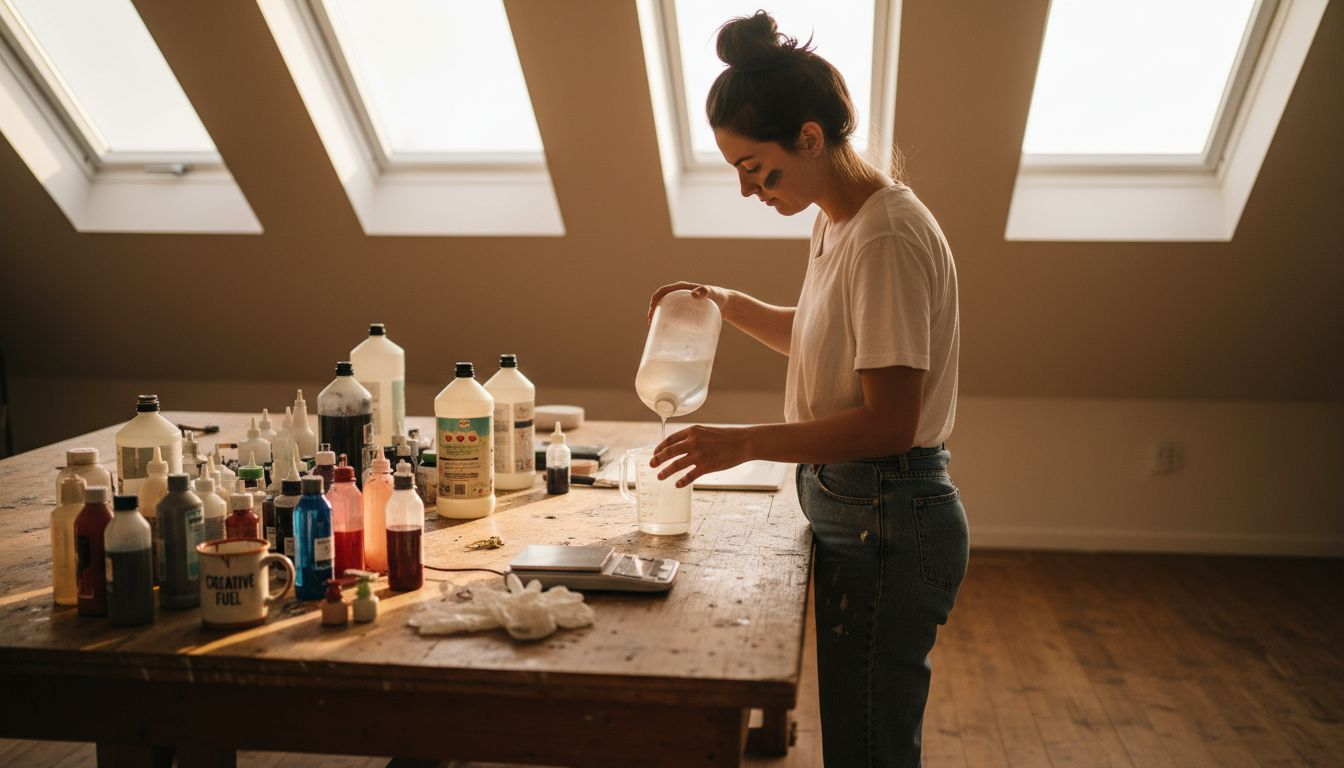
Creating stunning resin art begins with meticulous workspace preparation. Your setup determines the quality and success of your project, making thoughtful organization critical for achieving professional results.
Start by selecting a dedicated workspace with excellent ventilation. A clean, dust-free area near an open window or well-functioning exhaust system prevents unwanted particles from contaminating your resin artwork. Cover your work surface with disposable plastic sheeting or a silicone mat to protect surfaces and enable easy cleanup. Workspace organization tips can help streamline your creative process.
Gather all necessary materials before mixing your resin, ensuring smooth workflow and preventing interruptions. Your essential toolkit should include:
Protective gear (nitrile gloves, respirator mask, safety glasses)
Epoxy resin and hardener
Mixing cups and stir sticks
Colorants and pigments
Silicone or HDPE molds
Mold release spray
Paper towels
Measuring tools
Plastic drop cloth
Preparing your materials in advance allows you to focus entirely on your artistic vision. Measure your resin components precisely, checking manufacturer instructions for exact ratios. Keep your workspace organized and all supplies within easy reach to maintain an efficient creative rhythm.
Pro tip: Create a dedicated “resin station” with all your supplies arranged systematically to minimize workflow disruptions and maximize artistic productivity.
Step 2: Measure and Mix Resin Properly
Transforming your artistic vision into stunning resin artwork hinges on mastering the precise science of resin mixing. The success of your project depends entirely on accurate measurement and thorough combination of your resin components.
To achieve professional results, you’ll need a digital scale for precise component measurement. Accurate mixing techniques are critical for ensuring your resin cures correctly. Most epoxy systems require specific weight or volume ratios, which vary by manufacturer. Always refer to the product’s instructions and use these key guidelines:
Invest in a high-precision digital scale
Measure components in separate, clean containers
Follow manufacturer’s exact resin-to-hardener ratio
Use room temperature materials for optimal mixing
Select containers with clear volume markings
When mixing, employ a systematic technique that minimizes air bubbles and ensures complete integration. Stir gently but thoroughly, using a flat-bottomed stir stick and methodically scraping the sides and bottom of your mixing container. Move your stirring tool in a consistent, slow figure-eight pattern to blend components without introducing excessive air.
Improper mixing can result in tacky, uncured resin that compromises your entire artwork.
Work in small batches to maintain control and prevent premature curing. Most epoxy resins have a specific working time, so prepare only the amount you can use within that window.
Pro tip: Keep a timer nearby to track your mixing and working time, ensuring you maximize your resin’s performance and minimize potential errors.
Step 3: Select and Add Resin Colorants
Transforming your resin from transparent to vibrant artistic expression begins with strategic colorant selection. Understanding the nuanced world of resin pigmentation will elevate your artwork from ordinary to extraordinary.

Colorant selection techniques involve choosing from a diverse palette of options that each create unique visual effects. Your primary colorant choices include:
Here’s a quick reference to common resin colorant types and their artistic effects:
Colorant Type | Typical Visual Effect | Best Use Case |
Resin Dyes | Stained-glass transparency | Layered pours, luminous depth |
Mica Powder | Shimmering, rich color | Highlights, metallic accents |
Alcohol Ink | Fluid, watercolor look | Abstract backgrounds |
Acrylic Paint | Solid, bold coverage | Opaque applications |
Metallic Pigment | Reflective, luxurious finish | Sparkle or gilded details |
Resin dyes: Translucent, stained-glass-like effects
Mica powders: Opaque and shimmering finishes
Alcohol inks: Fluid, watercolor-like appearances
Acrylic paints: Solid, vibrant color dispersions
Metallic pigments: Luxurious, reflective characteristics
When introducing colorants, add them gradually during the mixing phase of resin and hardener. Start with small quantities and incrementally increase until you achieve your desired hue and opacity. Thorough mixing is crucial to ensure even color distribution and prevent clumping.
Professional artists understand that colorant integration is as much about technique as it is about artistic vision.
Consider the transparency and interaction of your chosen colorants with the underlying resin. Some pigments will create deep, rich colors, while others offer a more translucent, ethereal quality. Experiment with layering and blending techniques to develop unique, personalized artistic effects.
Pro tip: Create a color swatch journal to track your exact colorant ratios and mixing techniques, helping you replicate successful color combinations in future projects.
Step 4: Blend for Even Pigmentation
Achieving a flawless, professional-looking resin artwork requires mastering the delicate art of color blending. Your goal is to create smooth, uniform color distribution that captures your artistic vision without creating muddy or streaky results.
Pigment dispersion techniques demand precision and careful execution. Consider these critical blending strategies:
Control mixing temperature: Work between 90-115°F
Use slow, deliberate stirring motions
Add colorants in small, incremental amounts
Stir in a consistent figure-eight pattern
Pause and check color uniformity frequently
Timing and technique are crucial when integrating pigments. Begin mixing colors when your resin reaches a slightly thicker consistency, which helps prevent over-blending and maintains distinct color boundaries. Your stirring should be gentle yet thorough, ensuring pigments are evenly distributed without creating air bubbles or compromising the resin’s clarity.
Precision in pigment integration separates amateur craft from professional artistry.
Experiment with different blending techniques like layering, swirling, and gradual color transitions. Some artists use tools like toothpicks or thin stir sticks to create intricate color patterns without overmixing.
The following table summarizes key techniques to ensure even pigment blending in resin art:
Blending Technique | Purpose | Common Tools Used |
Layering | Create color transitions | Stir sticks, resin spatulas |
Swirling | Add dynamic visual interest | Toothpicks, fine brushes |
Incremental Mixing | Achieve uniform distribution | Flat-bottomed stir sticks |
Pause & Inspect | Check for consistency | Lighting, magnifier |
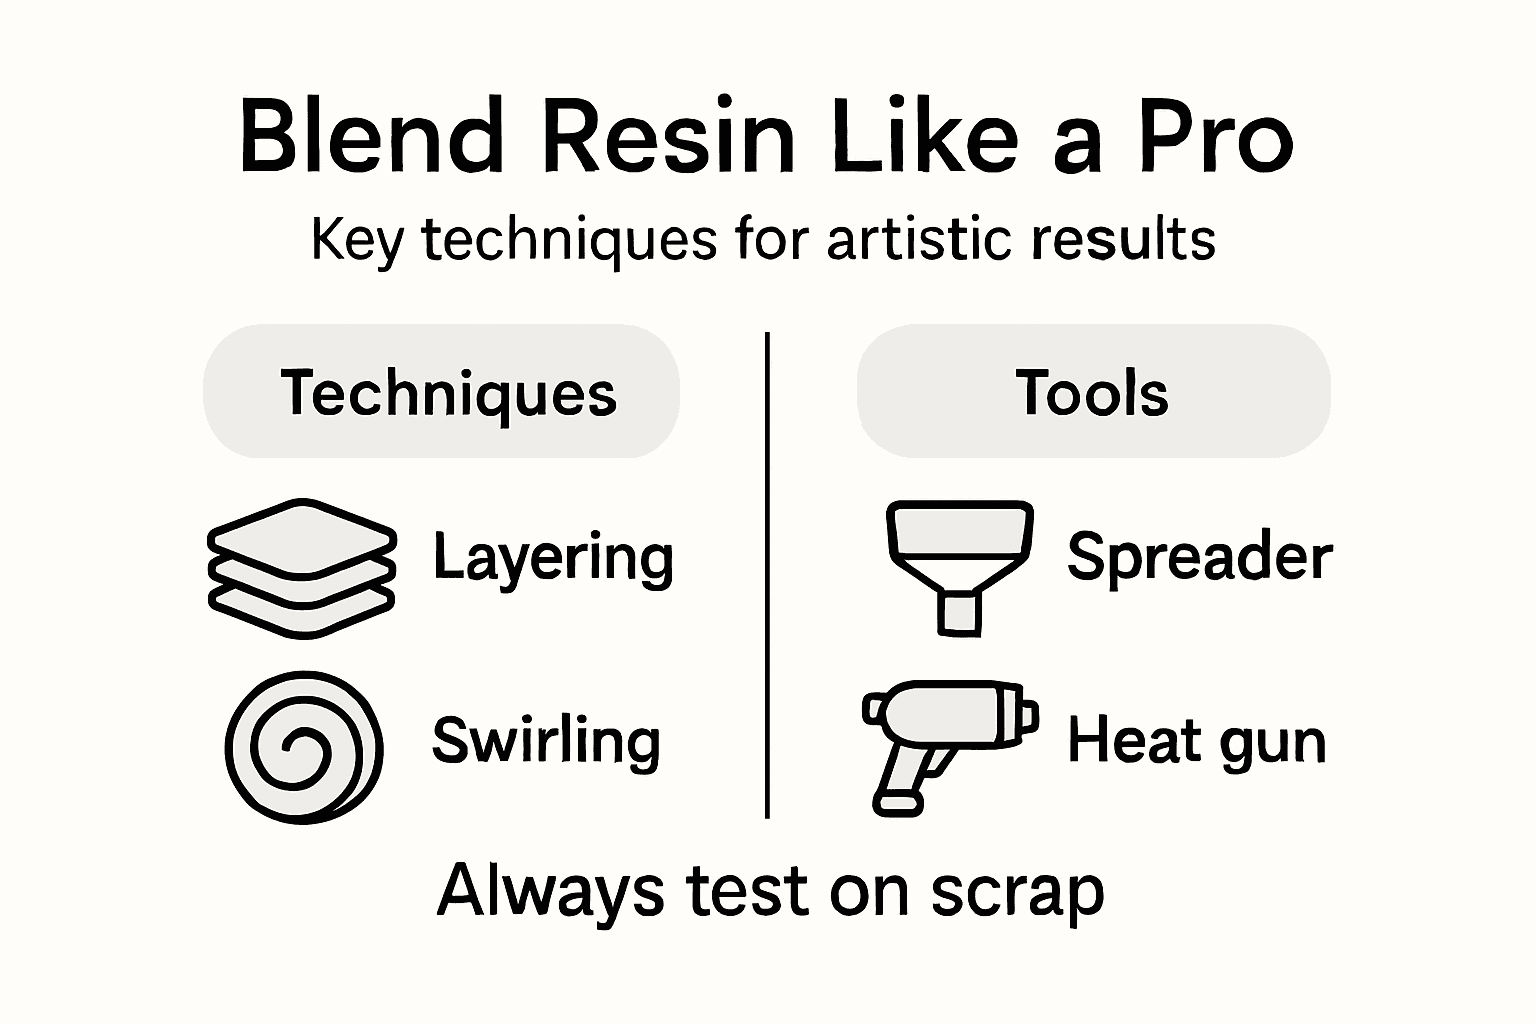
Pro tip: Create test swatches on scrap materials to practice your blending techniques and understand how different pigments interact before working on your final piece.
Step 5: Test and Adjust Color Intensity
Mastering color intensity is the subtle art of transforming your resin from a simple material to a vibrant artistic medium. Your ability to precisely control and fine-tune color will distinguish your artwork from amateur attempts.
Color testing techniques are critical for achieving your desired visual effect. Develop a systematic approach to color evaluation by following these strategic steps:
Pour small test samples of colored resin
Observe color under different lighting conditions
Compare cured samples side by side
Check translucency and depth of color
Evaluate interaction with underlying surfaces
Incremental pigment adjustment allows for remarkable precision. If your initial color appears too translucent, gradually add more pigment. When the color seems overly opaque, dilute with clear resin to achieve the perfect balance. Maintain a scientific yet creative approach by documenting each color modification in a dedicated notebook.
Consistent color reproduction requires methodical experimentation and careful observation.
Experiment with layering techniques to create depth and complexity. Sometimes, achieving the right intensity involves blending multiple colors or using translucent layers that interact with light in unique ways.
Pro tip: Create a color reference chart documenting exact pigment ratios and lighting conditions to help you replicate successful color formulations in future projects.
Step 6: Apply Colored Resin to Your Project
Transferring your meticulously mixed colored resin into your artwork requires precision, patience, and a strategic approach. Every pour is an opportunity to transform your creative vision into a tangible masterpiece.
Resin application techniques demand careful attention to detail and environment. Prepare your workspace by ensuring a clean, dust-free surface and having all necessary tools within reach:
High-quality silicone or plastic spreaders
Clean brushes for detailed work
Disposable gloves
Level work surface
Heat gun or torch for removing surface bubbles
Controlled pouring techniques are critical for achieving professional results. Begin by pouring your colored resin slowly and deliberately, allowing it to settle naturally into corners and crevices. For intricate designs, use smaller tools like toothpicks or fine brushes to guide the resin precisely where you want it.
Patience during application determines the quality of your final artwork.
Work within the resin’s pot life to prevent premature curing. If creating layered effects, allow each layer to partially cure before adding the next, which helps prevent color bleeding and maintains distinct visual boundaries.
Pro tip: Elevate your project surface slightly and use a level to ensure an even resin distribution, preventing pooling and creating a smooth, professional finish.
Elevate Your Resin Art With the Perfect Colorants and Supplies
Mastering resin colorant application demands precision, quality materials, and reliable tools. The article highlights key challenges like achieving consistent color intensity, even pigment blending, and flawless resin mixing. Artists often struggle with finding trustworthy products that deliver vibrant colors and smooth finishes every time. At Krystal Resin, we understand these frustrations and are dedicated to supporting your creative journey with top-tier resin products, colorants, and accessories designed for flawless results.
Unlock your resin art’s full potential by shopping our carefully curated selection of epoxy resins, pigments, and professional-grade molds. With free shipping options and fast delivery from our US warehouse, you can focus on perfecting your craft without the worry of delays or supply shortages. Visit Krystal Resin now and experience hassle-free shopping tailored to resin artists like you. Don’t let imperfect supplies hold back your artistic vision. Take the next step in mastering resin colorant application today by exploring our store and sourcing the materials proven to help your artwork shine.
Frequently Asked Questions
How do I prepare my workspace for resin colorant application?
To prepare your workspace, choose a clean, well-ventilated area free from dust and contaminants. Cover your work surface with disposable plastic sheeting or a silicone mat to simplify cleanup and keep materials organized.
What should I include in my resin mixing toolkit for color application?
Your resin mixing toolkit should include protective gear, mixing cups, stir sticks, colorants, molds, and measuring tools. Ensure all necessary materials are ready before you begin mixing to maintain smooth workflow and creativity.
How can I control color intensity in my resin artwork?
Control color intensity by gradually adding pigment to your resin mixture and pouring small test samples. This helps you evaluate color depth and translucency effectively before applying it to your final piece.
What techniques should I use for even pigment blending in resin art?
To achieve even pigment blending, use slow stirring motions in a figure-eight pattern and add colorants incrementally. Monitor for consistency regularly, and avoid over-mixing to maintain clarity and distinct color boundaries.
How do I apply colored resin to my project effectively?
When applying colored resin, pour slowly and deliberately to allow it to settle in corners. Use tools like silicone spreaders and fine brushes for detailed work, ensuring precision in your application and preventing color bleeding.
What is the best way to test my resin color before application?
Test your resin color by pouring small samples and observing them under various lighting conditions. Compare these samples side by side to evaluate overall color intensity and interaction with the underlying surface.
Recommended
Comments