

Epoxy Resin Troubleshooting: Fix Common Issues with Ease
- Nima
- Jan 19
- 8 min read

Sticky surfaces, cloudy finishes, and lingering bubbles often leave American epoxy resin artists feeling frustrated right as their creative project nears completion. Tackling these common issues is more than just fixing a mistake it directly affects your safety, workspace efficiency, and final results. This guide delivers practical troubleshooting tips and highlights the importance of a safe workspace setup so you can resolve problems confidently and achieve smoother resin finishes in your craft.
Table of Contents
Quick Summary
Key Point | Explanation |
1. Set Up a Safe Workspace | Choose a well-ventilated, stable area and equip it with protective gear to ensure both safety and quality in your resin project. |
2. Identify Common Problems Early | Regularly inspect your resin to spot issues like tackiness or bubbles before they compromise your project, allowing you to address them promptly. |
3. Correct Surface Issues Systematically | If you encounter defects, use proper techniques like sanding, applying heat, or reapplying resin to achieve a smooth finish. |
4. Prevent Bubbles and Cloudiness | Mix resin carefully and minimize air introduction; use heating tools or tapping to eliminate bubbles for professional clarity. |
5. Perform a Thorough Final Inspection | Check for imperfections and hardness in the finished product to ensure it meets high standards; minor flaws can be sanded down for perfection. |
Step 1: Prepare Your Workspace and Materials
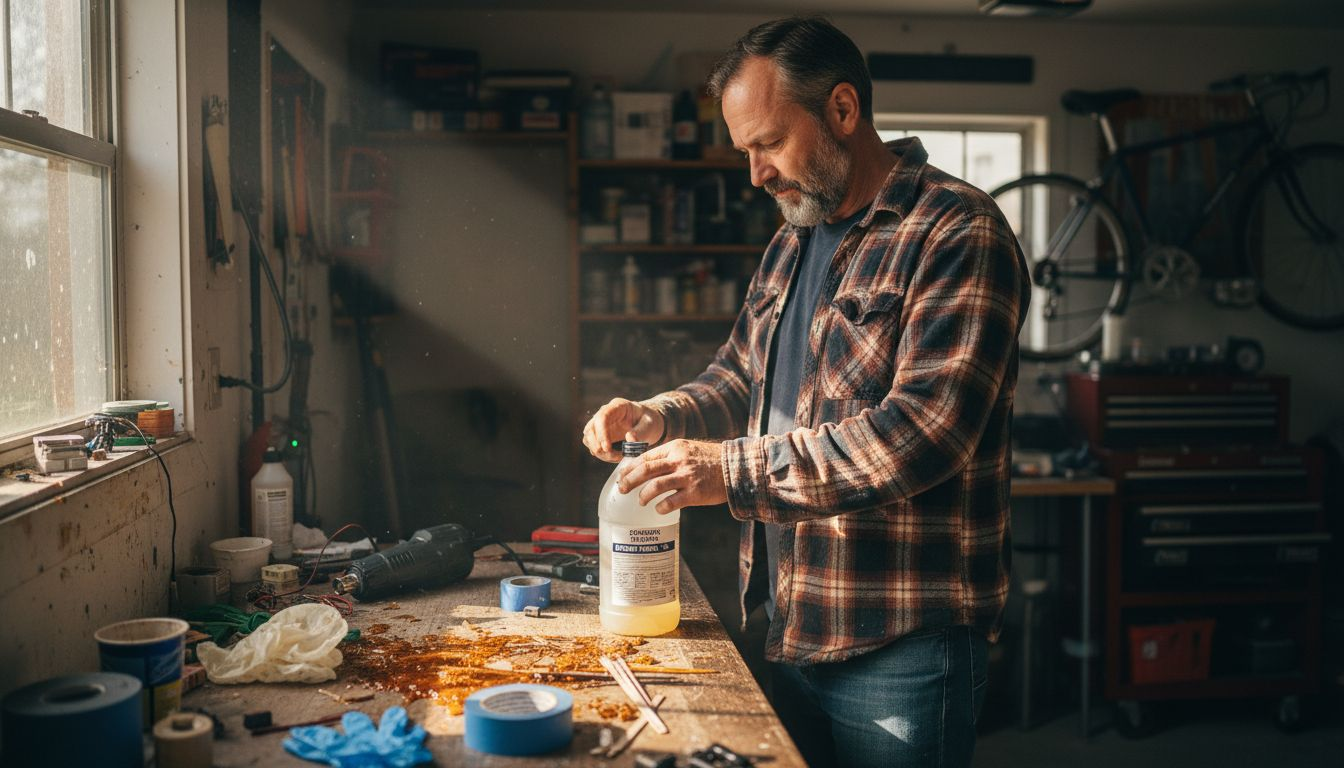
Creating a safe and organized workspace is critical when working with epoxy resin. Your preparation will directly impact the quality of your project and your personal safety. Before diving into your artistic endeavor, you’ll want to set up an environment that minimizes risks and maximizes your creative potential.
Start by selecting a well-ventilated area with a stable, flat surface. Ideally, choose a space away from high-traffic zones and with good natural or artificial lighting. Cover your work surface with disposable plastic sheeting or a silicone mat to protect against spills and make cleanup easier. Safe workspace preparation involves understanding potential hazards and taking proactive measures. Gather all necessary personal protective equipment including nitrile gloves, safety glasses, and a respirator rated for organic vapors. Wear long sleeves and pants made of materials that won’t absorb resin, and consider an apron for additional protection.
Arrange your materials within easy reach before mixing your resin. This includes your resin and hardener, mixing cups, stir sticks, measuring tools, colorants, and any molds or surfaces you’ll be working with. Having everything organized prevents contamination and reduces the chance of accidental spills. Keep a roll of paper towels, rubbing alcohol, and a dedicated trash bag nearby for immediate cleanup of any unexpected drips or messes.
The following table summarizes essential epoxy resin workspace and safety tools:
Workspace Tool | Main Purpose | Why It Matters |
Nitrile gloves | Prevent skin contact with resin | Protects from irritation |
Safety glasses | Shield eyes from splashes | Prevents eye injury |
Respirator (organic) | Filters out hazardous fumes | Avoids inhalation risks |
Silicone mat | Provides spill-proof work surface | Easy cleanup and protection |
Bright lighting | Improves visibility for inspection | Helps spot defects early |
Pro Tip: Create a dedicated resin workspace that can remain undisturbed during the curing process, keeping children and pets away from potentially harmful materials and delicate projects.
Step 2: Identify Visible Epoxy Resin Problems
Recognizing potential issues with your epoxy resin project early can save you time, materials, and frustration. Learning to spot common problems quickly will help you address them before they become irreversible mistakes that compromise your entire piece.
Start by carefully examining your resin surface for telltale signs of problems. Chemical degradation indicators reveal subtle changes that can signal deeper issues. Common visible problems include sticky or tacky surfaces, soft spots, uneven curing, bubbles, cloudiness, and unexpected texture variations. Sticky resin typically indicates incorrect mixing ratios or environmental conditions like low temperatures or high humidity. Look for areas that remain wet or soft when the rest of the piece has hardened these are clear signs of potential curing problems.
Pay close attention to color consistency, surface smoothness, and overall transparency. Uneven coloration, cloudiness, or an orange peel texture can signal mixing errors or contamination. Small surface imperfections might seem minor but can significantly impact the final aesthetic and structural integrity of your project. Inspect your piece from multiple angles and under different lighting conditions to catch subtle defects that might not be immediately apparent.
Here is a quick comparison of common epoxy resin issues and their likely causes:
Visible Problem | Most Likely Cause | Potential Impact |
Sticky/tacky surface | Incorrect mix ratio or humidity | Weak finish; attracts dust |
Bubbles | Air in mix or stirring too fast | Imperfect clarity |
Cloudiness | Moisture contamination | Dull, opaque appearance |
Uneven curing | Low temperature, incorrect mix | Soft spots; uneven strength |
Orange peel texture | Contamination or poor mixing | Rough, uneven aesthetics |
Pro Tip: Keep a well-lit workspace with natural light and use a magnifying glass to perform detailed inspections of your resin surface, helping you catch microscopic issues before they become larger problems.
Step 3: Correct Surface and Curing Issues
Successfully correcting epoxy resin surface and curing problems requires a systematic approach and understanding of the underlying causes. Your goal is to transform imperfect surfaces into smooth, professional quality finishes that showcase your artistic skills.
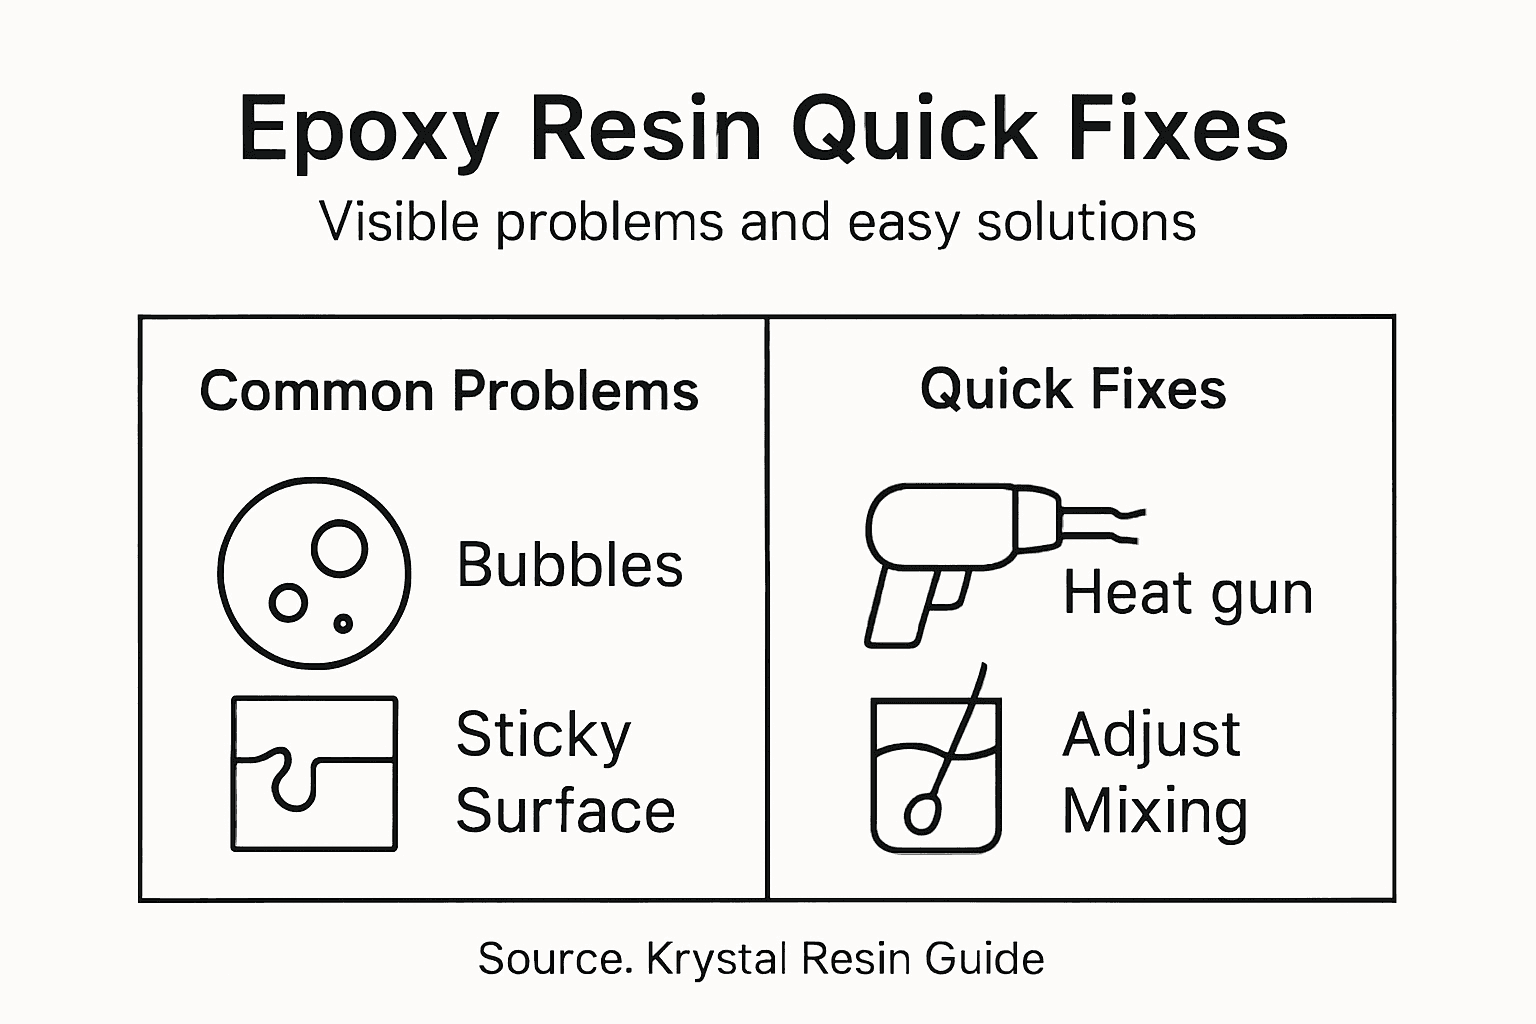
Composite curing agents play a critical role in resolving surface inconsistencies. For sticky or tacky surfaces, start by identifying the root cause. Insufficient mixing of resin and hardener, incorrect temperature, or humidity can prevent proper curing. If only specific areas remain uncured, carefully sand those sections using fine grit sandpaper to remove the sticky layer. Then clean the surface with rubbing alcohol to remove any residue before applying a thin additional layer of resin to restore smoothness.
For more extensive surface issues like bubbles, cloudiness, or uneven textures, you might need more comprehensive intervention. Use a heat gun on low settings to carefully eliminate surface bubbles, moving constantly to prevent burning. When dealing with major surface defects, sometimes removing the entire layer and reapplying resin is the most effective solution. Always work in a temperature controlled environment between 70 and 80 degrees Fahrenheit with low humidity to ensure optimal curing conditions.
Pro Tip: Keep a small torch or heat gun specifically designated for resin work, and practice your technique on scrap pieces to develop precise control over surface finishing.
Step 4: Eliminate Bubbles and Cloudiness
Bubbles and cloudiness can turn a potentially stunning resin project into a disappointing mess. Understanding how to prevent and remove these common defects will help you achieve crystal clear, professional looking results that showcase your artistic vision.
Vacuum chamber techniques offer an advanced solution for removing trapped air bubbles. Start by mixing your resin slowly and deliberately to minimize air introduction. Pour your mixture in a thin stream from a low height to reduce bubble formation. If bubbles do appear, use a small torch or heat gun carefully passed over the surface to help them rise and pop. Move the heat source continuously and keep it at least 4 inches away from the resin to prevent burning or discoloration.
For smaller projects, you can use alternative bubble removal methods. Gently tapping the mold or surface can help release trapped air. If cloudiness persists, it might indicate moisture contamination or improper mixing. Always work in a clean, dust free environment and ensure your mixing tools and surfaces are completely dry. For best results, mix resin components at room temperature and allow them to sit for a few minutes after initial mixing to let initial air bubbles naturally rise to the surface.
Pro Tip: Invest in a small kitchen torch with a fine flame control and practice your bubble removal technique on scrap resin pieces to develop a steady hand and perfect technique.
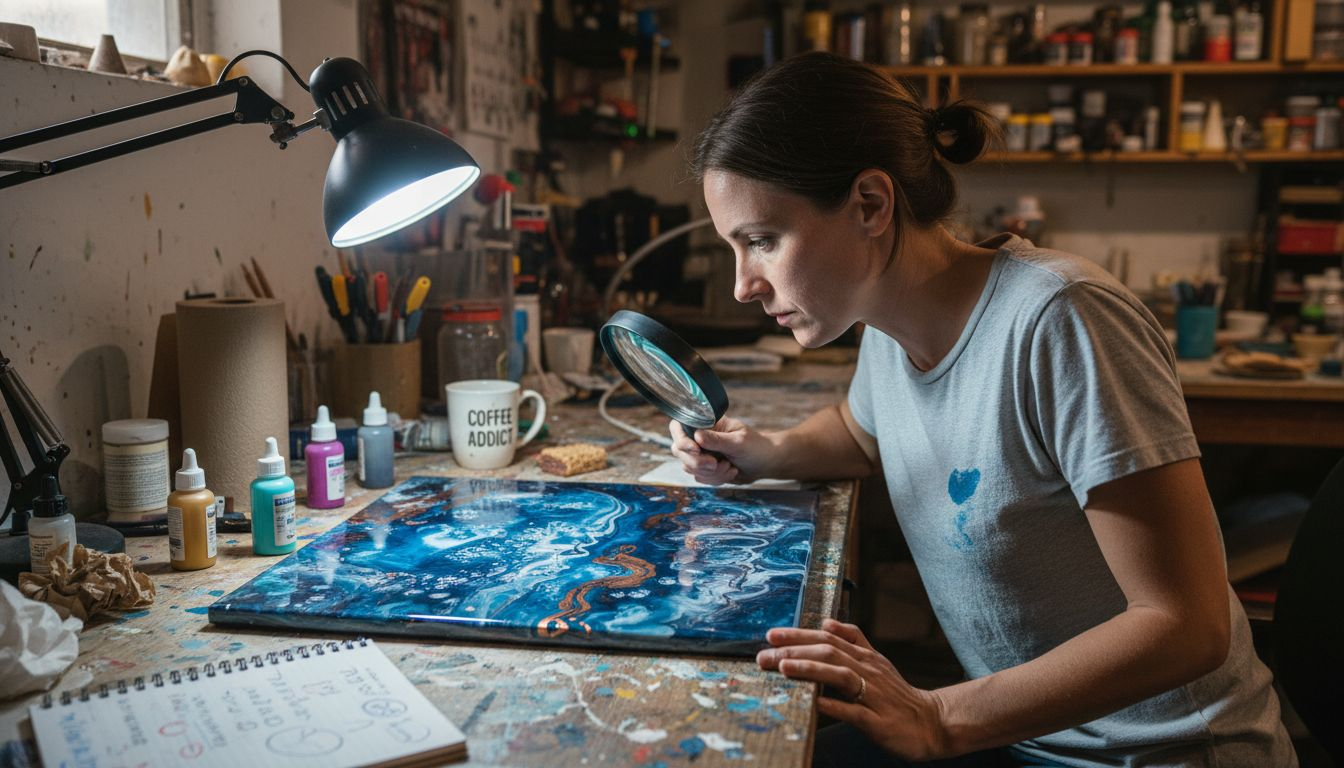
Step 5: Test and Inspect the Final Epoxy Finish
Successfully completing your resin project means carefully evaluating the finished product to ensure professional quality and durability. Your final inspection will determine whether your piece meets the highest standards of craftsmanship and aesthetic appeal.
Epoxy coating inspection techniques require a systematic and thorough approach. Begin by examining the surface under bright, natural light from multiple angles. Look for subtle imperfections like tiny bubbles, cloudiness, uneven coloration, or surface irregularities. Run your fingertips gently across the surface to detect any unexpected texture variations or rough spots. Check the edges and corners meticulously for complete coverage and smoothness. Test the hardness by pressing lightly with your fingernail it should not leave an indentation if the resin has cured correctly.
For more critical assessments, consider using specific testing methods. Perform a light adhesion test by placing a small piece of clear tape on the surface and removing it quickly to ensure no particles lift off. Check for proper curing by verifying that the entire piece feels uniformly hard and has a consistent, glass like finish. If you discover minor imperfections, you can often sand and polish the surface to achieve a flawless result. Remember that slight surface variations are normal and part of the handmade charm of resin art.
Pro Tip: Keep a dedicated bright desk lamp with natural spectrum lighting specifically for inspecting resin projects, which will help you catch microscopic details that might be missed under standard room lighting.
Achieve Flawless Epoxy Resin Results with the Right Supplies
Struggling with sticky surfaces, bubbles, or uneven curing in your epoxy resin projects can be frustrating. This article highlights common issues like incorrect mix ratios, environmental factors, and surface defects that can undermine your creative vision. To overcome these challenges, having premium resin products and reliable crafting accessories is essential. Krystal Resin offers carefully selected materials designed to help you mix accurately, work in optimal conditions, and finish your pieces with professional quality.
Discover high-quality resin, colorants, and molds that can transform your resin art experience at Krystal Resin. Get everything you need delivered fast with convenient shipping options, including from our US warehouse. Don’t let epoxy problems hold you back. Visit Krystal Resin today and start crafting with confidence knowing you have the right products for perfect results every time.
Frequently Asked Questions
What should I do if my epoxy resin has a sticky or tacky surface?
To fix a sticky or tacky surface, first identify the root cause, such as incorrect mixing ratios or environmental factors. Sand the affected areas with fine grit sandpaper, then clean the surface with rubbing alcohol before applying a thin new layer of resin to restore smoothness.
How can I remove bubbles from my epoxy resin project?
To remove bubbles, mix the resin slowly to minimize air introduction and pour it from a low height. If bubbles appear, use a small torch or heat gun held at least 4 inches away from the surface to help them rise and pop.
Why is my epoxy resin cloudy, and how can I fix it?
Cloudiness in epoxy resin often results from moisture contamination or improper mixing. Ensure you work in a clean, dust-free environment, and if cloudiness persists, remove the layer if needed and reapply a properly mixed resin.
What are the signs of uneven curing in epoxy resin?
Signs of uneven curing include soft spots, sticky areas, or changes in surface texture. Check for these irregularities, and if you find them, sand the affected areas, clean them, and apply another coat of resin to achieve an even finish.
How do I conduct a final inspection on my epoxy resin piece?
Perform a final inspection by examining the surface under bright, natural light for imperfections like bubbles, cloudiness, or uneven coloration. Run your fingertips across the surface to detect any rough spots, ensuring the entire piece feels uniformly hard and has a consistent finish.
What is the best temperature for curing epoxy resin?
The optimal curing temperature for epoxy resin is between 70 and 80 degrees Fahrenheit. Maintain this temperature range during the curing process to prevent issues like sticky surfaces or uneven consistency.
Recommended
Comments