

7 Examples of Resin Techniques Every Artist Should Try
- Nima
- Jan 10
- 10 min read

Nearly half of American resin artists admit that mastering new pouring techniques quickly improves the quality of their jewelry and home décor pieces. As creative hobbies spread across the United States, more crafters are looking for innovative methods to stand out in a crowded marketplace. Learn practical skills for professional results, from basic pouring to advanced color effects, using proven approaches that boost both creativity and craftsmanship.
Table of Contents
Quick Summary
Key Message | Explanation |
1. Use Proper Mixing Techniques | Mix resin and hardener in precise ratios to avoid air bubbles and ensure high-quality results. Stir slowly to minimize imperfections. |
2. Layer for Depth | Allow each transparent layer to partially cure before adding the next for dimensional effects. Use color selection wisely for visual interest. |
3. Embed Objects Correctly | Choose lightweight, dry objects and ensure they are fully surrounded by resin to prevent air bubbles during the pour. |
4. Master Geode Techniques | Create crystal-like designs by layering colors and using materials like mica powders for realistic geode effects. |
5. Finish with Care | Sand and polish your artwork progressively for a professional finish, using protective coatings to enhance durability and shine. |
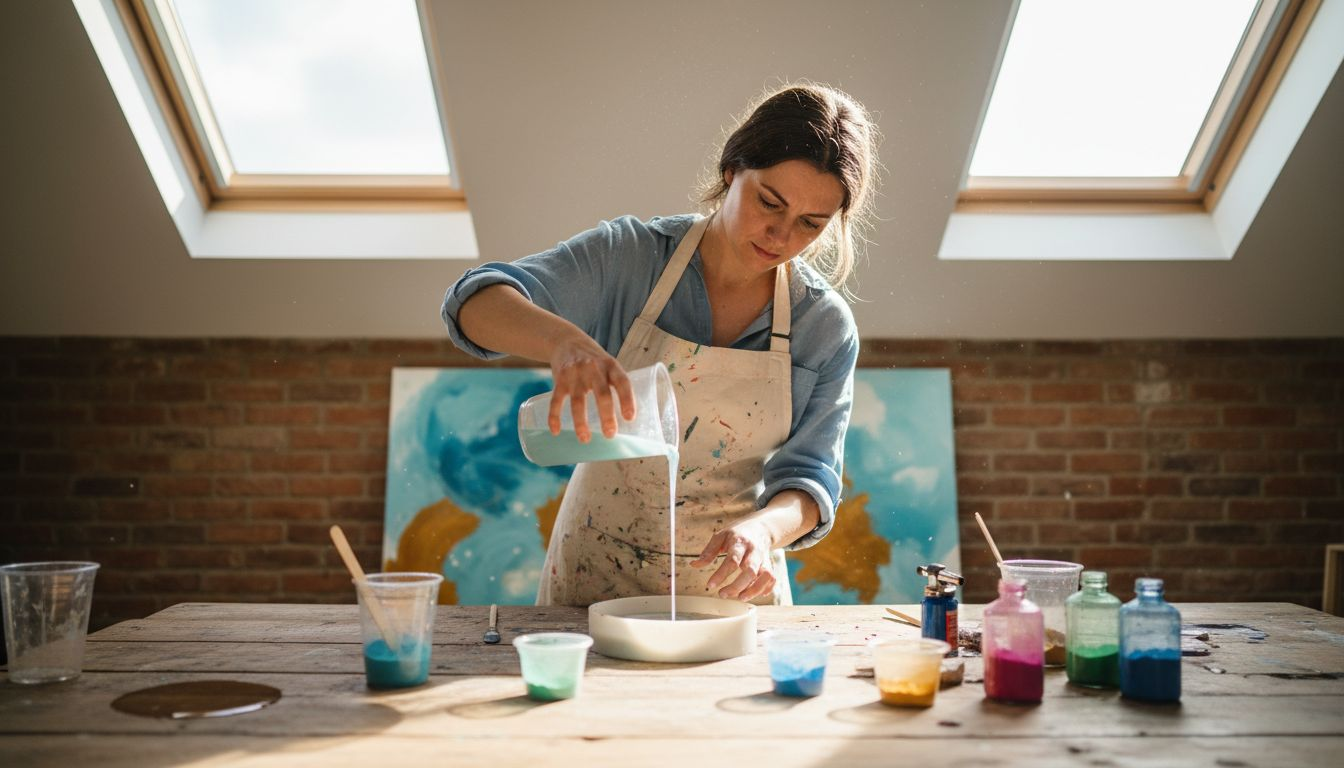
1. Basic Resin Pouring for Beginners
Resin pouring is an essential skill for artists wanting to create stunning and professional looking projects. Understanding the fundamental techniques of resin pouring basics will help you avoid common mistakes and produce high quality artwork.
When starting your resin art journey, you’ll need a few critical supplies: clear casting resin, mixing cups, stir sticks, gloves, and a level work surface. Temperature and workspace preparation are key factors in achieving smooth and bubble free results. Aim to work in a room around 70 to 75 degrees Fahrenheit with minimal humidity for optimal curing.
The pouring process requires careful technique. Start by mixing your resin according to manufacturer instructions, typically combining resin and hardener in precise ratios. Stir slowly and methodically to minimize air bubble formation, which can create imperfections in your final piece. Pour your mixed resin slowly from a low height to reduce potential bubble formation.
Color additions can transform your resin art. Use specialized resin pigments or alcohol inks to create beautiful color effects. Add colorants sparingly and mix thoroughly to achieve consistent color distribution without compromising the resin’s structural integrity.
Pro tip: Use a small torch or heat gun lightly over your poured resin to help eliminate surface bubbles and create a crystal clear finish.
2. Layering Effects to Add Depth
Resin art transforms from simple to spectacular when you master layering techniques in resin projects. This method allows artists to create complex visual landscapes with incredible depth and dimension.
Layering requires patience and precision. Each layer must be carefully poured and allowed to partially cure before adding the next, creating a stunning dimensional effect. Think of it like creating a visual story where each transparent or translucent layer reveals something new and unexpected.
To begin layering, start with a clear base layer that provides a solid foundation. Allow this initial layer to become tacky but not fully cured before adding your next color or inclusion. This technique ensures proper adhesion between layers and prevents complete separation. Experiment with different colors and opacities to create unique visual effects some artists refer to as resin landscapes.
Color selection plays a critical role in successful layering. Use transparent and opaque pigments strategically to build visual interest. Metallic powders, alcohol inks, and translucent colorants work wonderfully for creating depth. Remember that thin layers cure faster and provide more control over your final artwork.
Pro tip: Use a heat gun on low setting between layers to eliminate bubbles and ensure smooth transitions, but be careful not to overheat the resin.
3. Embedding Objects for Unique Designs
Embedding objects in resin transforms ordinary craft projects into extraordinary storytelling pieces. Mastering embedding techniques in resin art allows you to create personalized artwork that captures memories and imagination.
The key to successful object embedding is preparation. Select objects that are completely dry and clean with no moisture or oils that could compromise resin clarity. Lightweight items like dried flowers, small photographs, coins, or meaningful trinkets work best. Avoid organic materials that might decompose or release moisture during the curing process.
Before pouring resin, arrange your chosen objects carefully in the mold. Consider composition and visual balance to create an aesthetically pleasing design. Use tweezers for precise placement and ensure objects are fully surrounded by resin to prevent air bubbles. Some artists create intentional spaces or use strategic positioning to add depth and visual interest to their artwork.
To ensure crystal clear results, pour resin slowly and methodically. Start with a thin base layer that allows you to position objects precisely. Then carefully add additional resin to fully cover and encapsulate your embedded items. Different resin types offer varying levels of clarity and durability, so choose a casting resin specifically designed for object preservation.
Pro tip: Use a toothpick or small brush to gently nudge embedded objects into position and remove any tiny air bubbles before the resin begins to set.
4. Creating Geode-Inspired Resin Art
Geode inspired resin art transforms ordinary surfaces into spectacular mineral like landscapes that capture the mesmerizing beauty of natural crystal formations. Resin geode techniques offer artists an exciting way to create intricate visual masterpieces that shimmer and shine.
To begin your geode art journey, select a solid base like wood panel or canvas. Start with a foundation layer of clear resin mixed with white or neutral tones. This base provides structure for the subsequent color layers that will mimic crystal growth patterns. Experiment with mica powders and translucent pigments to build depth and create the illusion of intricate mineral structures.
Color selection is critical in achieving realistic geode effects. Use gradient shades of blues, purples, or metallics to simulate natural crystal variations. Layer your colors strategically starting from darker tones at the edges and gradually transitioning to lighter shades in the center. Crushed glass fragments and metallic powders can add extraordinary texture and light reflection to your artwork.
Technique matters as much as materials. Pour resin slowly and use a heat gun to carefully remove surface bubbles without disturbing your carefully placed color gradients. Tilting your canvas and allowing colors to flow naturally will create more organic looking crystal patterns that mimic geological formations.
Pro tip: Practice creating small test pieces first to understand how different pigments interact and learn how slight angle changes can dramatically transform your geode design.
5. Using Silicone Molds for Jewelry Making
Silicone molds are the secret weapon for creating professional looking resin jewelry with consistent and intricate designs. Crafting silicone molds opens up endless possibilities for unique and personalized jewelry pieces.
Choosing the right silicone is critical for successful mold making. Platinum cure silicone offers superior detail capture and durability compared to other mold materials. Look for food grade silicone that provides high clarity and allows easy demolding without damaging delicate resin pieces. Consider mold complexity when selecting silicone type some intricate designs require more flexible compounds.
To create a professional mold, begin by preparing a clean master model. Use smooth surfaces like polymer clay or 3D printed objects as your original piece. Apply a release agent to prevent the silicone from sticking to your master model. Mix silicone compounds carefully following manufacturer instructions ensuring precise ratios to guarantee optimal mold quality.
Jewelry makers can experiment with various mold shapes from simple geometric forms to complex sculptural designs. Pendant molds circular disk molds and intricate shape molds provide versatility for creating earrings bracelets and other wearable art. Understanding how different silicone properties affect your final product will help you select the perfect mold for each project.
Pro tip: Store your silicone molds flat in a cool dark place and dust them lightly with cornstarch between uses to prevent sticking and maintain their crisp detail.
6. Swirling and Marbling Color Techniques
Swirling and marbling techniques transform ordinary resin art into extraordinary visual experiences that capture fluid motion and vibrant energy. Advanced color manipulation techniques allow artists to create mesmerizing patterns that seem to dance across the surface.
To achieve stunning marble effects, start by selecting complementary or contrasting colors that will create visual interest. Pour your base resin color first, then carefully add secondary colors using techniques like dropping pigments from a height or using thin stir sticks to gently pull colors through the resin surface. Movement is key creating dynamic swirls requires a delicate touch and intentional manipulation.
Different tools can produce unique marbling results. A heat gun provides subtle flow and helps blend colors seamlessly while a toothpick or wooden skewer allows precise line work and intricate pattern creation. Metallic pigments add extraordinary depth creating shine and dimension within your swirled design. Experiment with angle and speed of movement to discover how different techniques produce dramatically different visual outcomes.
Color selection plays a crucial role in successful marbling. Stick to a limited palette of 2 to 4 colors for maximum visual impact. Transparent and opaque pigments can be combined to create layers of complexity. Understanding how colors interact and blend will help you predict and control your artistic results.
Pro tip: Practice your swirling technique on small test pieces first to understand how different viscosities and color combinations interact before committing to a larger artwork.
7. Polishing and Finishing Tips for a Professional Look
The final polish can transform a good resin piece into an exceptional work of art. Professional finishing techniques elevate your resin creations from amateur craft to gallery worthy pieces.
Sanding is the critical first step in achieving a flawless finish. Begin with coarse grit sandpaper around 220 grit to remove any significant surface imperfections. Progressively move to finer grits like 400 600 and ultimately 1000 or 2000 grit sandpaper. Always sand in consistent circular motions to ensure an even surface and prevent visible scratching.
After sanding, buffing brings out the ultimate shine. Use a soft microfiber cloth and specialized resin polishing compounds to create a crystal clear surface. Electric buffing tools can provide professional grade results but hand buffing works well for smaller projects. Apply polishing compound sparingly and use light consistent pressure to avoid creating new surface marks.
Protective coatings can add durability and enhance the visual appeal of your resin artwork. UV resistant clear sprays provide an additional layer of protection against yellowing and environmental damage. Apply thin even coats and allow complete drying between applications to prevent clouding or uneven surfaces.
Pro tip: Work in a dust free environment and wear clean cotton gloves during final polishing to prevent introducing new surface contaminants that could compromise your pristine finish.
Below is a comprehensive table summarizing techniques, tools, and strategies discussed for creating resin art for both beginners and advanced practitioners.
Topic | Description | Pro Tips |
Basic Resin Pouring | Discusses essential tools, workspace preparation, and resin mixing methods for smooth base layers. | Work in a low-humidity room at 70–75°F and stir resin slowly to minimize air bubbles. |
Layering Depth Effects | Guides on creating dimensional effects through sequential resin layer applications. | Allow each layer to become tacky before applying the next for adhesiveness. |
Embedding Objects | Instructions for embedding items such as dried flowers into resin compositions. | Use tweezers for precise object placement and eliminate air bubbles with a toothpick. |
Geode-Inspired Art Techniques | Combines mica powders, pigments, and glass effects to create natural mineral formations in resin. | Begin with a clear or neutral-tone foundation and experiment with brush-on color gradients. |
Silicone Mold Jewelry Making | Overview of creating molds and using them to design resin jewelry. | Use high-quality silicone for durability and apply a release agent to prevent sticking. |
Swirling and Marbling Techniques | Describes blending colors to create elegant patterns and visual motion within resin pieces. | Use complementary color choices and a heat gun to form seamless finishes and engaging visuals. |
Polishing and Finishing | Describes sanding, buffing, and protective finishing coats to enhance the final resin artwork quality. | Progress through finer sandpapers and use UV-resistant sprays to retain artwork longevity. |
Elevate Your Resin Art with Professional Materials from Krystal Resin
Mastering resin techniques like layering, embedding objects, and creating geode-inspired designs can be challenging without the right supplies. This article highlighted how crucial factors like choosing high-quality resin, using precise pigments, and working with flexible silicone molds influence every step of your creative process. Avoiding common issues such as bubbles, poor cure quality, and dull finishes starts with picking trusted materials designed for artists who want flawless results.
Imagine bringing your swirling marbled patterns and multilayered artworks to life with crystal clear clarity and vibrant colors. Whether you aim to make stunning jewelry pieces using silicone molds or craft intricate home décor, Krystal Resin offers a wide selection of premium resins, colorants, and essential tools delivered quickly and reliably.

Experience the difference quality makes and get inspired to try new resin techniques today. Visit Krystal Resin to explore our full range of resin products. Start enhancing your resin projects with expert supplies now for free shipping on qualifying orders. Turn your artistic visions into reality by shopping smart and acting fast at Krystal Resin.
Discover professional-grade materials perfect for layering and embedding techniques that bring your creativity to the next level. Learn more and shop here at Krystal Resin.
Frequently Asked Questions
What is resin pouring and how do I start?
Resin pouring is a technique where artists mix resin and hardener to create beautiful projects. To start, gather supplies such as clear casting resin, mixing cups, and stir sticks, and ensure your workspace is clean and at the right temperature, around 70 to 75 degrees Fahrenheit.
How can I create depth in my resin art projects?
To create depth, use layering techniques by allowing each layer of resin to partially cure before adding the next one. Start with a clear base layer and then choose colors that contrast but complement each other, ensuring the layers adhere properly for a visually stunning effect.
What are the best practices for embedding objects in resin?
Prepare your objects by ensuring they are dry and clean, then arrange them in your mold before pouring resin. Pour a thin base layer first, then add more resin gradually to encapsulate the objects fully, ensuring no air bubbles are trapped to maintain clarity.
How do I achieve a marbled effect with resin?
To achieve a marbled effect, pour a base color first and then add secondary colors in a dropping motion or with swirling tools. Work quickly to manipulate the colors while the resin is still fluid, experimenting with different color combinations to create dynamic patterns.
What finishing techniques can enhance the appearance of resin art?
To enhance your resin art, start by sanding with progressively finer grits of sandpaper, moving from coarse to fine until the surface is smooth. Follow this with buffing using a soft cloth and polishing compound to bring out a brilliant shine, ensuring your final piece looks polished and professional.
How can I prevent bubbles when working with resin?
To minimize bubbles, mix your resin slowly and carefully according to instructions, avoiding vigorous stirring. Additionally, using a heat gun or torch lightly over the poured resin can help eliminate surface bubbles for a clear finish.
Recommended
Comments