

How to Cure Epoxy Resin for Seamless Craft Projects
- Nima
- Jan 17
- 7 min read

Every American resin artist knows that even a tiny bit of dust can ruin hours of creative work. Craft hobbyists across North America want reliable methods to prevent imperfections and achieve a flawless finish. With over 80 percent of epoxy mishaps traced back to workspace setup, mastering each step of the process means smoother projects and stronger results. Learn practical tips for workspace organization, precise mixing, and expert curing to bring your resin art to a professional level.
Table of Contents
Quick Summary
Key Point | Explanation |
1. Organize Your Workspace | Create distinct areas for mixing, curing, and cleaning to enhance efficiency and safety. |
2. Measure Exactly for Mixing | Use precise ratios and mix thoroughly to ensure optimal chemical reactions for your resin. |
3. Control Curing Environment | Maintain consistent temperature and low humidity to achieve the best finish on your project. |
4. Verify Cure Quality | Inspect your resin for hardness and clarity to ensure proper curing before completing your project. |
5. Use Pro Tips for Better Results | Utilize time management and tools like heat sources and test pieces to enhance your crafting process. |
Step 1: Prepare your workspace and resin supplies
Successful resin crafting begins with meticulous workspace preparation and organized supplies. Understanding how to set up your work area can dramatically improve your project outcomes and prevent potential mishaps.
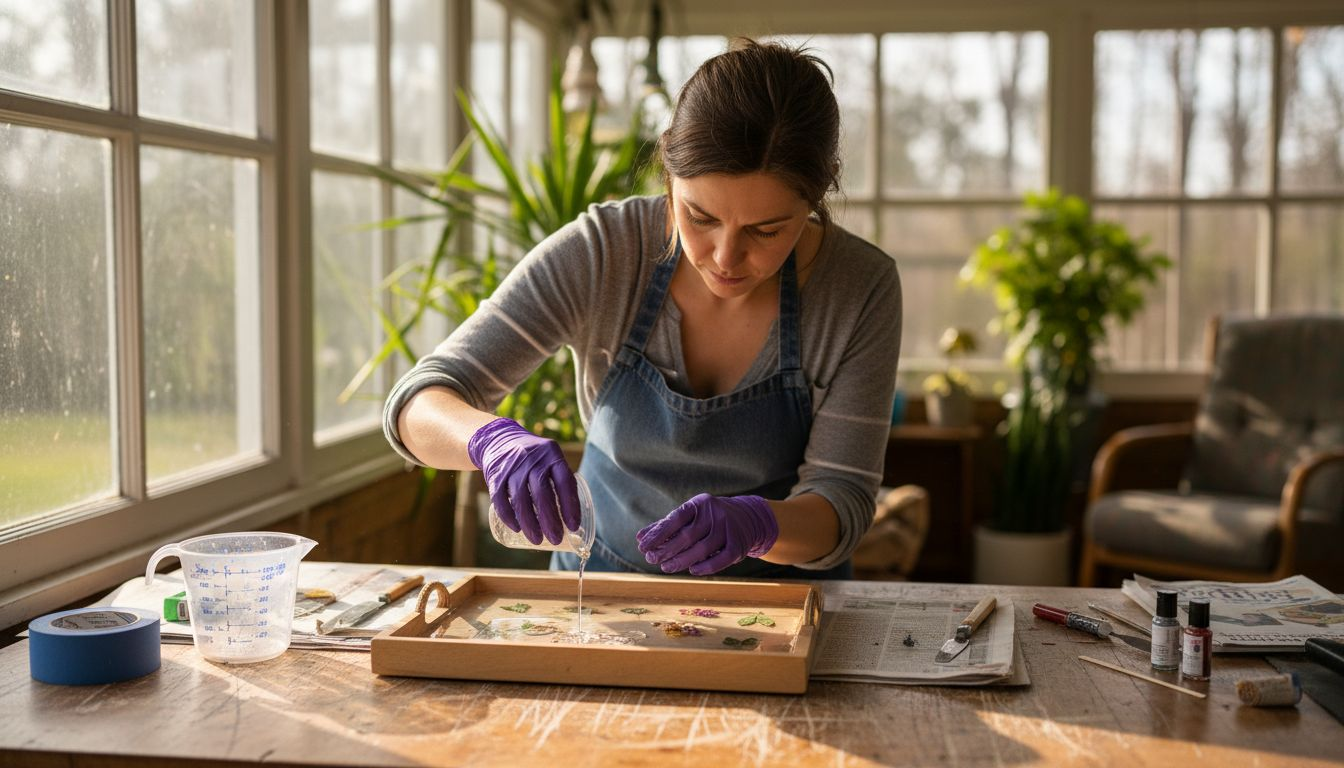
Start by selecting a clean, well-ventilated workspace with a flat surface. Choose a location away from direct sunlight and potential dust sources. Cover your work surface with a disposable drop cloth or silicone mat to protect it from potential spills. Gather all necessary supplies in advance: precise epoxy preparation equipment including measuring cups, mixing sticks, disposable gloves, respirator mask, and protective eyewear.
Organize your resin components methodically. Place your resin and hardener within easy reach, ensuring they are at room temperature for optimal mixing. Separate your workspace into distinct zones: a mixing area, a curing area, and a cleaning station. Keep paper towels, rubbing alcohol, and a trash bin nearby for quick cleanup. Check that your mixing containers are clean, dry, and free from any residue that could contaminate your resin.
Here’s a quick summary of workspace zones and their functions in resin crafting:
Workspace Zone | Primary Function | Key Supplies Needed |
Mixing Area | Prepare and mix resin and hardener | Measuring cups, mixing sticks, gloves |
Curing Area | Allow resin to set undisturbed | Dust cover, level surface, fan nearby |
Cleaning Station | Manage spills and cleanup | Paper towels, rubbing alcohol, bin |
Pro tip: Always keep a timer nearby to track precise mixing and curing times for consistent results.
Step 2: Mix epoxy resin and hardener accurately
Achieving a flawless resin project depends on precise mixing of resin and hardener. Understanding the correct techniques will help you create professional looking crafts with consistent, durable results.
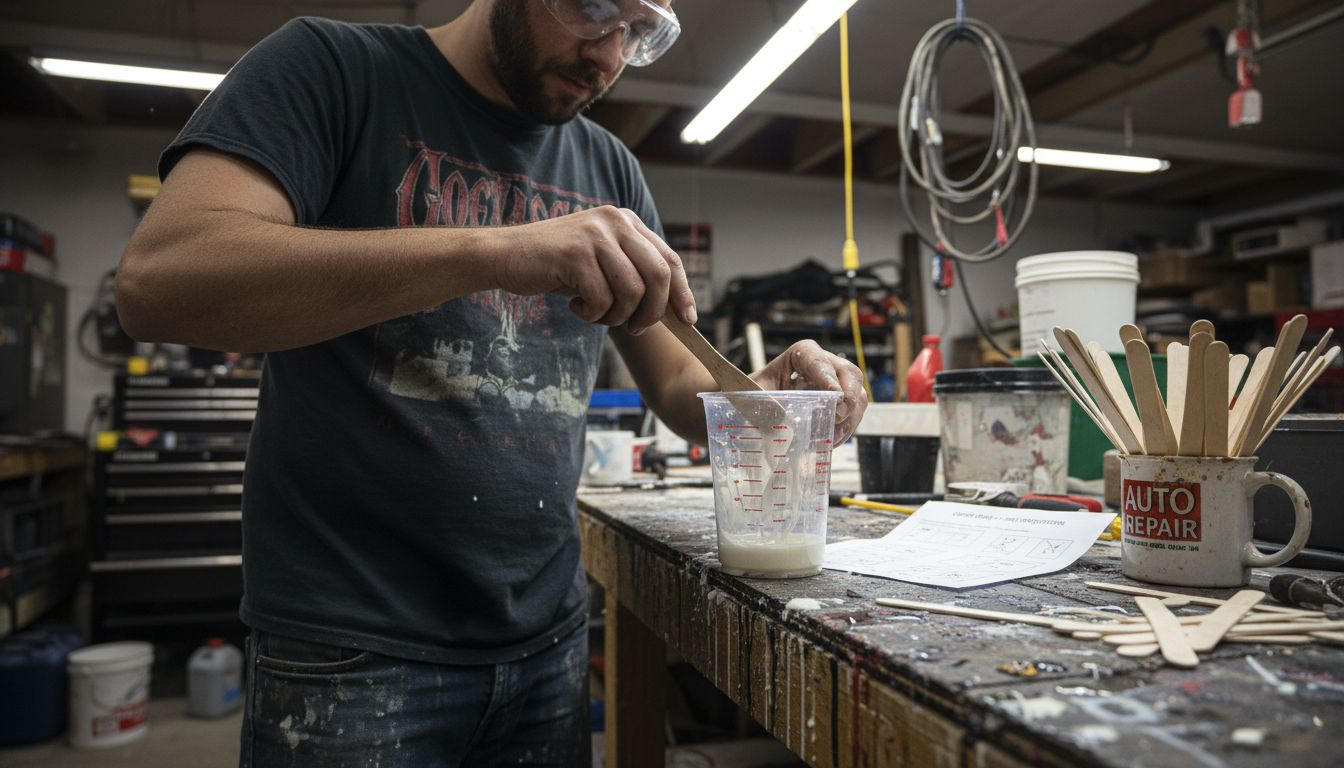
Begin by carefully measuring your resin and hardener according to the manufacturer’s recommended precise stoichiometric mixing ratios. Most epoxy systems require exact weight or volume measurements to ensure proper chemical reaction. Use separate graduated measuring cups for resin and hardener to prevent cross contamination. Pour the hardener into the resin first, not the reverse order, which can impact the chemical bonding process.
Mix the components thoroughly but gently to minimize air bubble formation. Use a flat mixing stick and stir in a consistent figure eight motion for approximately 3 to 4 minutes. Scrape the sides and bottom of the container to ensure complete integration. Work at room temperature and avoid rapid or aggressive stirring that could introduce unwanted bubbles. Your goal is a uniformly clear and streak free mixture with no unmixed regions.
Pro tip: Use a kitchen torch or heat gun on low setting to carefully remove surface bubbles immediately after mixing.
Step 3: Pour and spread epoxy resin onto your project
Transforming your creative vision into reality requires careful application of epoxy resin. Understanding the right techniques will help you achieve a smooth professional finish that showcases your artistic skills.
Start by carefully pouring and spreading epoxy resin/18%3A_Ethers_and_Epoxides_Thiols_and_Sulfides/18.09%3A_Chemistry_MattersEpoxy_Resins_and_Adhesives) across your project surface. Begin at one edge and slowly pour the mixed resin, allowing it to self level and naturally spread. Use a plastic spreader or foam brush to guide the resin evenly across the surface, working from the center outward in smooth continuous strokes. Maintain a consistent thickness by applying gentle pressure and tilting your work surface if needed to help distribute the resin.
Work methodically and maintain a steady hand to prevent air bubble formation or uneven coverage. Check your work from multiple angles to ensure complete surface coverage. Move slowly and deliberately to maintain control over the resin application. Pay special attention to edges and corners where resin can pool or create uneven surfaces. Your goal is a uniform layer that enhances your project without obscuring underlying details.
Pro tip: Warm your resin slightly before pouring to improve its flow and reduce potential air bubble formation.
Step 4: Control environmental factors during curing
Successful resin crafting hinges on creating the perfect environment for your project to cure. Understanding how external conditions impact your final result will help you achieve professional quality finishes.
Maintain a stable environment by carefully managing temperature and humidity during curing. Aim for a consistent room temperature between 70 and 80 degrees Fahrenheit with low humidity levels around 50 percent. Place your project in a dust free area away from direct sunlight or air conditioning vents. Use a clean dust cover or plastic container with ventilation holes to protect your piece while allowing air circulation. Avoid moving or disturbing the resin during the initial curing phase to prevent surface imperfections or trapped particles.
Monitor your project periodically without touching it. Watch for any signs of uneven curing or unexpected color changes. Position your workspace in a location with steady ambient temperature to prevent sudden shifts that could compromise the curing process. Consider using a small fan for gentle air circulation but keep it at a distance to avoid introducing dust or disrupting the resin surface.
Compare the main environmental factors that impact resin curing:
Factor | Ideal Range | Impact if Not Controlled |
Temperature | 70-80°F | Slow or uneven curing, defects |
Humidity | ~50% relative | Cloudiness, tacky surface |
Dust/Particles | Minimal | Surface imperfections, dullness |
Airflow | Gentle, indirect | Uneven cure, dust contamination |
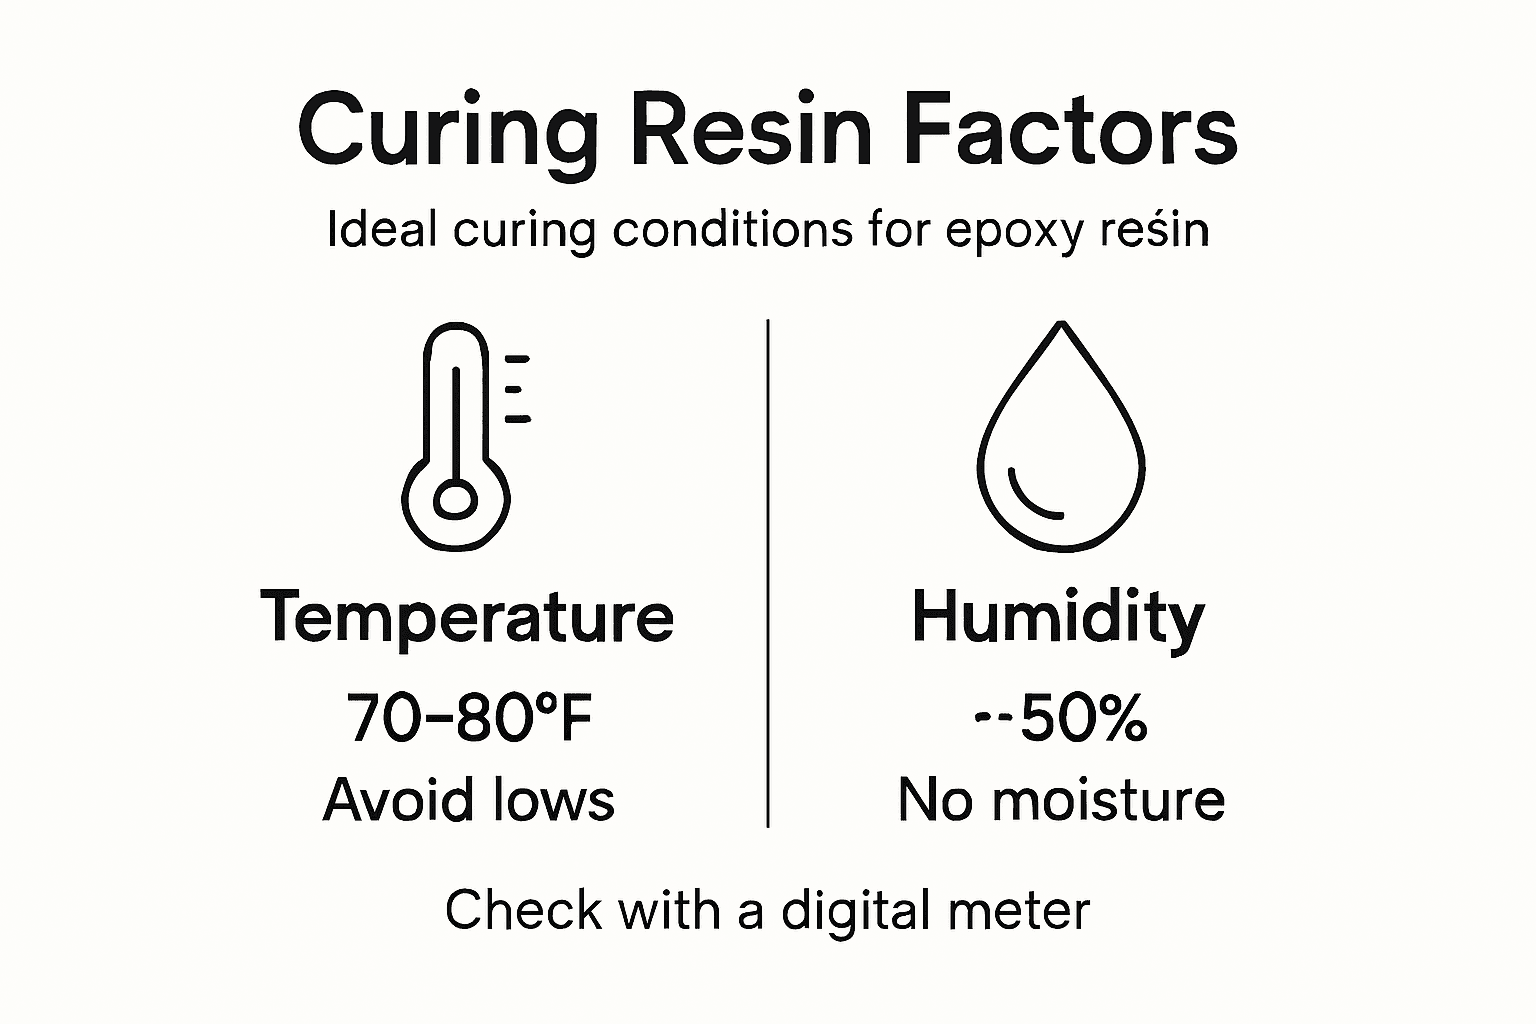
Pro tip: Use a digital thermometer and hygrometer to track exact environmental conditions throughout the curing process.
Step 5: Verify full cure and ensure project quality
Confidence in your resin project comes from knowing you have achieved a perfect finish. Understanding how to evaluate your project will help you recognize a successful cure and professional results.
Carefully assess your project by checking resin mechanical properties and cure quality. Press gently with your fingernail at multiple points on the surface. A fully cured resin will feel hard and consistent with no soft or tacky areas. Examine the surface under bright light for any cloudiness or inconsistencies that might indicate incomplete curing. Check the edges and deep areas of your project where curing can be slower. The entire surface should have a clear glossy appearance with uniform transparency.
Run additional diagnostic tests to confirm complete curing. Try bending or flexing thin resin sections to test structural integrity. A properly cured resin will maintain its shape without cracking or showing signs of weakness. If your project requires maximum durability, consider waiting an additional 24 to 48 hours beyond the recommended cure time to ensure complete cross linking. Temperature and humidity during the curing process significantly impact final product quality.
Pro tip: Create a small test piece alongside your main project to check curing conditions without risking your primary artwork.
Master Your Epoxy Resin Curing for Flawless Craft Projects
Struggling with inconsistent cures and unwanted bubbles in your epoxy resin projects? The challenges of precise mixing ratios, environmental control, and careful pouring can be frustrating for artists who demand perfection. This article highlights essential tips like using exact stoichiometric mixing, maintaining ideal temperature and humidity, and verifying full cure to achieve professional results every time.
At Krystal Resin, we understand your passion for seamless, high-quality resin art. Our premium resin products and thoughtfully curated craft supplies make it easier to conquer these common obstacles. Whether you need reliable resin kits, colorants, or pouring tools, we provide everything to help you execute each step perfectly. Discover how our materials support your creativity while ensuring consistent curing and brilliant finishes.

Ready to take control of your resin curing process and bring your artistic vision to life? Shop now at Krystal Resin for trusted supplies and prompt service that keep your projects flowing smoothly. Don’t let curing challenges hold you back unlock flawless results today.
Frequently Asked Questions
How do I prepare my workspace for curing epoxy resin?
Successful curing begins with a well-prepared workspace. Choose a clean, well-ventilated area and cover your surface with a drop cloth to catch spills.
What is the ideal temperature and humidity for curing epoxy resin?
The ideal temperature for curing epoxy resin is between 70 and 80 degrees Fahrenheit, with humidity levels around 50 percent. Maintain these conditions to ensure an even and smooth cure.
How can I tell if my epoxy resin has fully cured?
To verify full curing, press gently on the surface with your fingernail. A fully cured resin will feel hard and show no tackiness or soft spots.
What can I do if my epoxy resin has bubbles after mixing?
If bubbles appear after mixing your resin, use a kitchen torch or a heat gun on a low setting to carefully remove them. This should be done immediately after mixing to achieve the best results.
How long should I wait before using my cured epoxy project?
While most epoxy resins cure fully within 24 to 48 hours, consider waiting an additional 24 to 48 hours for maximum durability. Allowing this extra time helps ensure a robust final product without any weaknesses.
How do I manage dust and particles during the curing process?
Protect your curing project by placing it in a dust-free area with a dust cover. This will help prevent surface imperfections and maintain a high-quality finish.
Recommended
Comments