

DIY Resin Casting Workflow for Jewelry and Home Décor
- Nima
- Jan 24
- 11 min read

Starting a resin art project can quickly become overwhelming if your supplies are scattered or your workspace is poorly set up. American creators aiming for smooth jewelry and flawless home décor know that a clear workflow is the secret to frustration-free results. With this guide you get crucial steps like workspace preparation, safety gear, and mixing techniques explained plainly, setting you up to work efficiently and achieve the brilliant finishes that make resin art truly shine.
Table of Contents
Quick Summary
Key Insight | Explanation |
1. Gather essential supplies | Stock up on resin, molds, safety gear, and tools before starting your project to minimize frustration and ensure safety. |
2. Prepare your workspace | Set up in a clean, well-ventilated area to avoid dust and ensure stable temperatures during the curing process. |
3. Mix resin carefully | Measure and mix resin and hardener thoroughly to avoid bubbles and ensure proper curing; follow your product’s instructions closely. |
4. Pour with precision | Pour resin slowly and steadily into molds to prevent air bubble formation and ensure a smooth finish. |
5. Inspect and finish your pieces | Check for imperfections post-demolding and use wet sanding and polishing for a professional look; apply clear coat for added durability. |
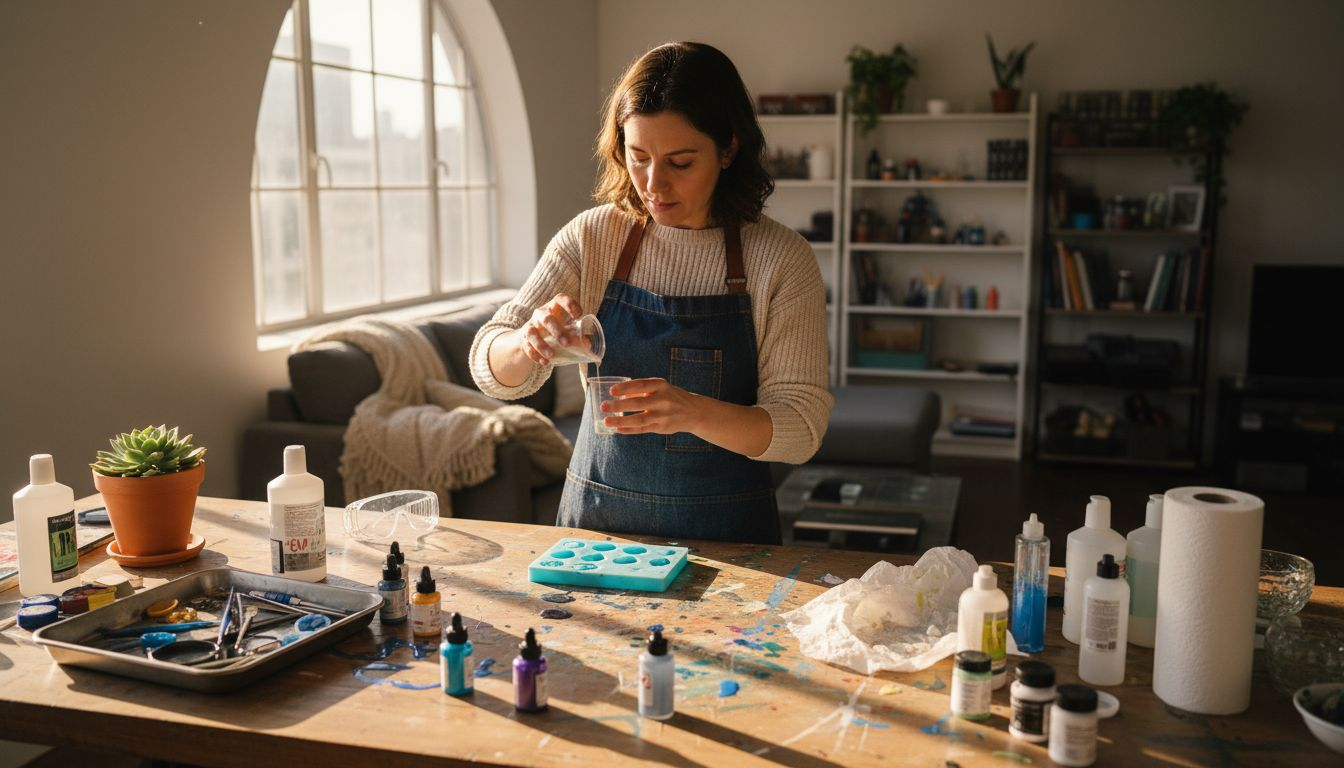
Step 1: Gather Essential Resin Casting Supplies
Before you pour a single drop of resin, you need to stock up on the right supplies. Getting this step right saves you from wasted materials, frustration, and safety issues down the road. Think of this phase as building your foundation—skip it, and everything that follows becomes much harder.
Start with the resin itself. You’ll want to choose between different types depending on your project goals. A casting resin kit gives you everything measured and ready to go, which works great when you’re learning the workflow. Beyond the resin base, grab molds made from silicone or HDPE plastic (silicone is more durable for repeated use), and invest in a quality mold release spray so your finished pieces pop out cleanly. You’ll also need proper measuring scales to get the resin-to-hardener ratio exactly right, mixing cups you don’t mind throwing away afterward, and stir sticks for thorough blending without introducing air bubbles. Clear containers help you see exactly what you’re mixing.
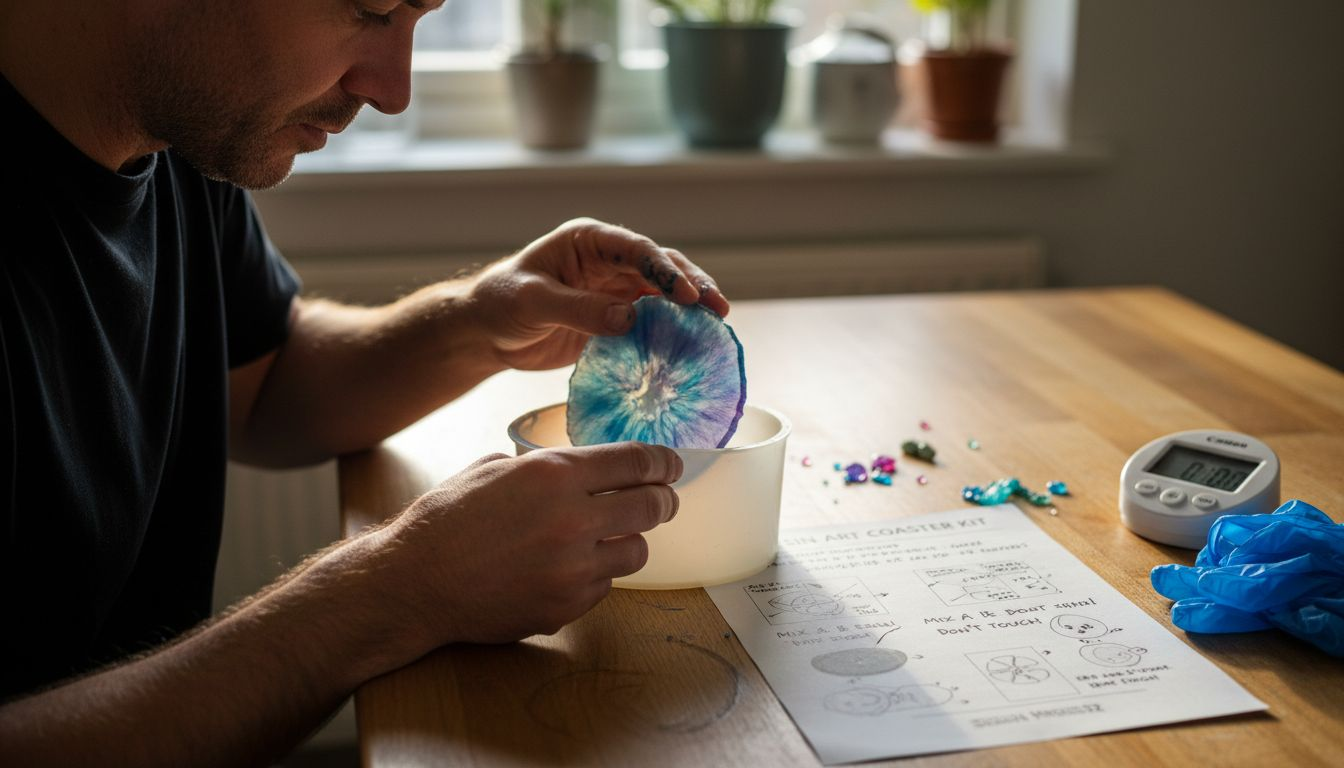
Safety gear is not optional. Grab nitrile gloves that won’t degrade from resin contact, a quality respirator mask (not just a dust mask), and eye protection. Working in a well-ventilated space matters too. Some artists overlook this step and regret it when respiratory irritation kicks in mid-project. You’ll also want paper towels, rags, or old cloth for cleanup, a heat gun or torch for popping surface bubbles, and a work surface you can protect with plastic sheeting or old newspaper. If you’re planning to add color or texture to your pieces, gather any colorants and additives you want to experiment with, whether that’s mica powders, liquid dyes, or inclusions like glitter or dried flowers. Organize everything in one spot before you begin—you don’t want to be searching for supplies when your resin is actively curing.
Here’s a quick comparison of common resin mold types and their advantages:
Mold Material | Durability | Ease of Demolding | Best For |
Silicone | Very durable | Extremely easy | Jewelry, detailed items |
HDPE Plastic | Good | Easy | Larger pieces |
Rigid Plastic | Less durable | Moderate difficulty | Simple shapes |
Plaster | Poor | Difficult | Prototyping only |
Pro tip: Buy safety gear first, resin second. A cheap respirator can ruin your entire crafting experience and health, so invest in a proper half-face or full-face respirator rated for organic vapors—your lungs will thank you on project number three when you’re still feeling good.
Step 2: Prepare Workspace and Mix Resin Properly
Your workspace setup and mixing technique directly determine whether your finished pieces turn out flawless or riddled with bubbles and imperfections. This step separates amateur results from professional-looking work, so take it seriously. You are essentially creating the conditions that allow your resin to cure perfectly while protecting yourself and your environment.
Start by setting up your workspace in a clean, well-ventilated area, ideally with airflow that carries fumes away from where you are standing. A garage with a door open, a workshop with a fan running, or even an outdoor covered space works well. Dust and debris settle into wet resin and ruin your pieces, so wipe down your work surface with a damp cloth first and let it dry completely. Lay down plastic sheeting or disposable tablecloths to protect your workspace from inevitable spills. Keep the temperature stable between 70 and 75 degrees Fahrenheit if possible, since resin cures differently in cold or hot conditions. Now measure your resin and hardener components using your scales. The ratio matters immensely, usually 2 parts resin to 1 part hardener, though this varies by product, so always check your specific product instructions. Pour both components into your mixing cup without splashing, then begin the most critical part: mixing.
Mix slowly and deliberately for at least three to five minutes, making sure to scrape the sides and bottom of the cup where unmixed resin collects. Thorough mixing ensures proper curing throughout your finished piece. The goal is to achieve a completely uniform color and consistency without introducing air bubbles. Work methodically rather than aggressively, folding the mixture back on itself instead of stirring in circles. Once your resin is thoroughly blended, let it sit for two to three minutes before pouring. This resting period allows any air bubbles you accidentally created during mixing to rise to the surface and escape naturally. You will notice the resin becoming slightly clearer as it rests. After this short pause, you are ready to pour into your molds. Work quickly but calmly at this stage, as the resin is now beginning its curing process and will gradually become thicker and harder to manipulate.
Pro tip: Mix resin in tall, narrow cups rather than wide, shallow ones because narrow containers allow trapped air bubbles to escape more easily and give you better control over pouring without sloshing your mixture everywhere.
Step 3: Pour Resin Into Molds with Precision
This is where patience becomes your greatest asset. The pouring stage determines whether your jewelry pieces have crystal clarity and your home décor items look professionally finished or cloudy with visible defects. Rushing this step undoes all the careful work you did in preparation, so slow down and focus on technique.
Position your mold on a level, stable surface where it will not be disturbed. If you are working with silicone molds, you have flexibility since they stretch and release easily, but rigid molds demand extra care to avoid overflow. Hold your mixing cup at a slight angle and begin pouring resin slowly from the center of the mold, moving outward in a controlled, steady stream. This technique minimizes air bubble entrapment and prevents resin from splashing onto mold edges where it can create messy seams on your finished piece. Pour deliberately, taking your time rather than rushing to empty the cup. If your mold has intricate details or narrow channels, pour even more slowly to allow resin to flow naturally into every crevice without trapping air pockets. The speed of your pour directly affects bubble formation, so treat this as a meditative process, not a race. As the mold fills, watch for air bubbles rising to the surface and appearing as tiny spheres on top of the resin. Let them float naturally to the surface where they will escape during curing.
Once your mold is full, resist the urge to move it immediately. Let it sit undisturbed for at least ten to fifteen minutes so trapped air can continue escaping and bubbles can rise and pop naturally. Some experienced artists use a heat gun or torch to gently pass over the resin surface, which causes surface tension bubbles to burst. If you notice significant bubbling, you can also tap the sides of your mold gently with your finger to encourage bubbles to move upward. After this waiting period, your resin needs to cure undisturbed according to the manufacturer’s timeline, typically 24 hours or longer depending on the product thickness and room temperature. Place a dust cover over your molds using a cardboard box or plastic dome to keep airborne particles away during curing.
Pro tip: Pour at room temperature or slightly cooler, as cool resin flows more smoothly and holds fewer bubbles than warm resin, giving you better control and clearer final pieces.
Step 4: Cure and Demold Your Cast Creations
Curing is where your patience truly pays off. This stage transforms liquid resin into solid pieces, but rushing the process leads to sticky, fragile creations that crumble or warp. The curing timeline depends on your resin type, mold thickness, and room temperature, so follow your product instructions carefully and resist the temptation to demold early.
Your mold should sit undisturbed in a well-ventilated space during the entire curing period. Most standard casting resins cure at room temperature within 24 hours, though thicker pieces may require 48 to 72 hours for complete hardness throughout. Temperature matters significantly, since cooler environments slow curing while warmer ones speed it up. Avoid placing molds in direct sunlight or near heat sources, as this can cause uneven curing and surface bubbling. Premature demolding damages castings, so wait until your resin achieves complete hardness. You can test readiness by gently pressing your fingernail against an edge of the mold. If the resin feels tacky or leaves an impression, it needs more time. Once fully cured, the resin should feel hard and slightly warm to the touch, with no give when pressure is applied.
When curing time has passed, it is time to demold your creation. For flexible silicone molds, gentle pressure on the back of the mold peels it away from your piece. Work slowly and deliberately, flexing the mold gradually around the edges rather than yanking it off aggressively. If your piece has delicate details or is especially fragile, apply pressure from multiple angles to ease removal gradually. Rigid plastic or plaster molds require more careful handling. Sometimes you can tap the mold gently with a rubber mallet to loosen it, or carefully run a flexible knife blade around the edges to break the seal. Never force a stuck piece from its mold, as breaking the piece is far worse than taking extra time to remove it carefully. Once demolded, your piece may feel slightly sticky or have a waxy surface coating. This is normal and washes away with warm soapy water. Your resin piece continues to harden over the next several days as any remaining volatile compounds escape, so give pieces at least a week of curing time before heavy use or handling.
Pro tip: Mark your molds with demolding dates using masking tape so you know exactly when each piece reached full cure, preventing the guesswork of whether demolding time has truly arrived.
Step 5: Inspect and Finish Resin Projects Neatly
Your resin piece is demolded, but the work is far from over. The inspection and finishing stage separates amateur creations from pieces that look professionally crafted and ready to display or gift. This is where you catch imperfections, smooth rough edges, and achieve that crystal clear finish that makes resin jewelry and décor truly shine.
Start by examining your piece under bright light, ideally natural daylight. Look for surface bubbles, cloudiness, rough mold seams, or areas where the resin appears dull instead of clear. Small bubbles on the surface are cosmetic issues you can address through sanding and polishing. Larger internal bubbles trapped inside the resin cannot be fixed, so these pieces become learning opportunities rather than disasters. Feel the edges and surface with your fingers to identify any rough spots or tool marks from demolding. Once you know what you are working with, grab your sandpaper and begin wet sanding with fine grit starting at 600 or higher. Wet sanding prevents resin dust from flying everywhere and keeps your sandpaper from clogging. Use circular motions, working slowly and steadily rather than aggressively scrubbing. You are removing the outermost hazy layer and any surface imperfections, not reshaping the piece. After the initial sanding, progress to higher grit sandpaper like 800, then 1000 if you want an even finer finish. Each step takes your piece closer to that glassy, polished appearance.
Once sanding is complete, wash your piece thoroughly with warm soapy water to remove all resin dust, then dry it completely. Now comes the satisfying part: polishing. Apply a resin polishing compound with a soft cloth or polishing pad, working it in circular motions across the entire surface. This step dramatically increases clarity and brings out the sparkle in your jewelry or the depth in your home décor items. For jewelry pieces, you can also use automotive polish or jewelry polishing compounds designed for clear materials. For tabletop resin or home décor, consider applying an application guide recommended clear coat to enhance durability and add an additional layer of protection. Your finished piece should now feel smooth to the touch, look crystal clear, and have a satisfying glossy sheen that makes all your effort worthwhile.
Here’s a summary of key finishing techniques and their result:
Technique | Purpose | Expected Result |
Wet Sanding (600+ grit) | Smooth rough edges | Matte, even surface |
Higher Grit Sanding | Increase clarity | Finer, clearer finish |
Polishing Compound | Add shine and clarity | Glossy, glass-like look |
Resin Clear Coat | Improve durability | Enhanced protection |
Rotary Tool Polishing | Speed up finishing | Uniform, professional sheen |

Pro tip: Use a rotary polishing tool with a foam pad attachment to finish large home décor pieces much faster than hand polishing, saving you significant time while achieving professional results.
Elevate Your Resin Casting Projects with Premium Supplies and Expert Support
Mastering the DIY resin casting workflow requires not only patience but access to high-quality materials that guarantee flawless results every time. Whether you are striving for crystal-clear jewelry pieces or stunning home décor, common challenges like air bubbles, uneven curing, and fragile demolding can hold back your creativity. The good news is that with the right resin types, precise measuring tools, and safe workspace gear, your projects will transform from frustrating experiments into professional-level artworks.

At Krystal Resin, we understand these pain points and are dedicated to helping artists and hobbyists like you succeed. Explore our wide range of casting resin kits, molds, colorants, and essential safety equipment specifically chosen to support the crucial steps of mixing, pouring, curing, and finishing. Enjoy the convenience of shopping with us featuring fast shipping options, including direct delivery from our US warehouse. Dive into your next project with confidence and all the right products on hand by visiting Krystal Resin. Ready to raise the bar on your resin art? Discover everything you need to master every step of the casting process today at Krystal Resin and start creating flawless, lasting pieces you can be proud of.
Frequently Asked Questions
What supplies do I need for DIY resin casting?
To start DIY resin casting, gather essential supplies including casting resin, molds (preferably silicone), measuring scales, mixing cups, stir sticks, safety gear (gloves, respirator, eye protection), and cleanup materials. Organize everything in one spot before you begin to avoid delays during the process.
How do I properly mix resin for casting?
Mix resin by measuring the components according to the manufacturer’s recommended ratio, usually 2 parts resin to 1 part hardener. Stir slowly for three to five minutes, ensuring you scrape the sides to combine thoroughly and allow air bubbles to escape for a clearer final product.
What is the best way to pour resin into molds?
Pour resin slowly from the center of the mold, moving outward in a controlled manner to minimize air bubbles. Hold the mixing cup at a slight angle and avoid splashing; let the filled mold sit undisturbed for at least ten to fifteen minutes to let trapped bubbles rise to the surface.
How long should I let resin cure before demolding?
Cure resin according to the product instructions, typically 24 to 72 hours depending on thickness and temperature. Wait until the resin is fully hard and feels slightly warm to the touch before attempting to demold to prevent damage.
What techniques can I use to finish my resin projects?
Use wet sanding with fine grit sandpaper to smooth edges and increase clarity, then apply a polishing compound for a glossy finish. Ensure to wash your piece with warm soapy water after sanding to remove dust before polishing for optimal results.
How can I prevent bubbles when casting resin?
To reduce bubbles, mix slowly and deliberately, and use tall, narrow mixing cups. Allow the mixed resin to rest for a few minutes before pouring, as this gives air bubbles time to rise and escape naturally.
Recommended
Comments