

Resin Mold Casting Workflow for Flawless Art Pieces
- Nima
- Jan 6
- 7 min read

Most American resin artists end up wasting at least 15 percent of their supplies due to simple preparation mistakes. If you have ever finished a jewelry or home décor project only to spot a flaw caused by dust, uneven mixing, or rushed curing, you are not alone. Improving your resin mold casting workflow leads to cleaner results, less waste, and a smoother creative experience every time whether you are in the USA or Canada.
Table of Contents
Quick Summary
Key Point | Explanation |
1. Gather All Essential Supplies | Assemble high-quality casting resin, molds, mixing containers, and protective gear for effective resin casting. |
2. Properly Prepare Molds | Clean and treat molds with a release agent to ensure easy demolding and preserve detail in the final piece. |
3. Mix Resin Accurately | Use a digital scale for precise measurements and mix gently to avoid air bubbles, leading to a smoother finish. |
4. Cure Resin in a Controlled Environment | Maintain consistent temperature and avoid disturbances during curing to achieve professional-quality results. |
5. Inspect Casts Thoroughly | Examine finished pieces for flaws and clean molds after use to extend their durability for future projects. |
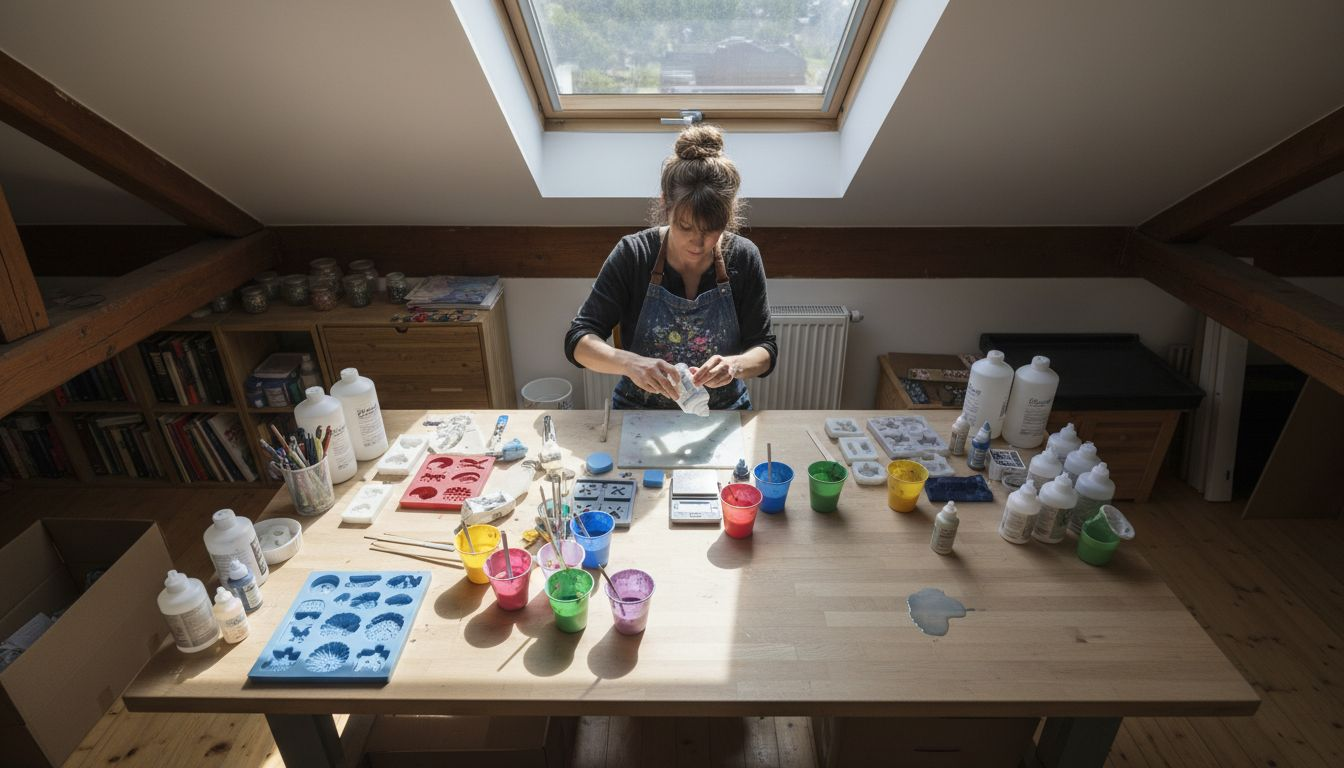
Step 1: Gather Essential Resin Supplies
Resin casting starts with assembling the right materials and tools to create stunning art pieces. Before diving into your project, you’ll want to collect a comprehensive set of supplies that will help you achieve professional quality results. Precise equipment preparation is critical for ensuring smooth workflows and minimizing potential mistakes.
Your essential resin casting kit should include high-quality casting resin and hardener, flexible silicone molds in various shapes and sizes, multiple mixing containers, wooden or plastic stirring sticks, and protective gear like disposable gloves and safety glasses. Consider investing in additional tools such as a digital scale for accurate measurements, a heat gun for eliminating bubbles, and a level workspace with good ventilation. The specific resin type you select will depend on your project requirements some resins work better for jewelry while others excel in creating larger decorative pieces.
Here is a quick comparison of common types of casting resin and their primary applications:
Resin Type | Best For | Key Properties |
Epoxy Resin | Jewelry, coasters | Crystal clear, strong, easy to color |
Polyester Resin | Casting art, sculptures | Cost-effective, durable, strong odor |
Polyurethane Resin | Prototyping, figurines | Fast curing, can be flexible or rigid |
UV Resin | Small decorative items | Instant curing under UV light |
Prepare your workspace by covering surfaces with disposable plastic sheets or newspapers to protect against potential spills and drips. Gather all your materials before starting to ensure a streamlined casting process that minimizes interruptions and potential errors.
Pro tip: Always buy slightly more supplies than you think you’ll need to account for potential mistakes or unexpected project variations.
Step 2: Prepare and Treat Resin Molds
Preparing your resin molds correctly is a critical step that determines the quality and finish of your final art piece. Proper mold preparation can make the difference between a professional result and a disappointing casting.
Begin by thoroughly inspecting your silicone molds for any imperfections or debris. Clean each mold carefully using isopropyl alcohol and a lint-free cloth to remove dust particles and ensure a pristine surface. If your molds are new or have been stored for a while, gently wash them with mild soap and water then allow them to air dry completely. Apply a thin even layer of mold release agent to help your resin piece separate smoothly after curing this step prevents sticking and helps maintain the intricate details of your mold.
Position your cleaned and treated molds on a level surface covered with a protective sheet. Double check that they are completely dry and free from any residue before pouring your resin. Positioning your molds in a clean dust-free area will help ensure the best possible casting results.
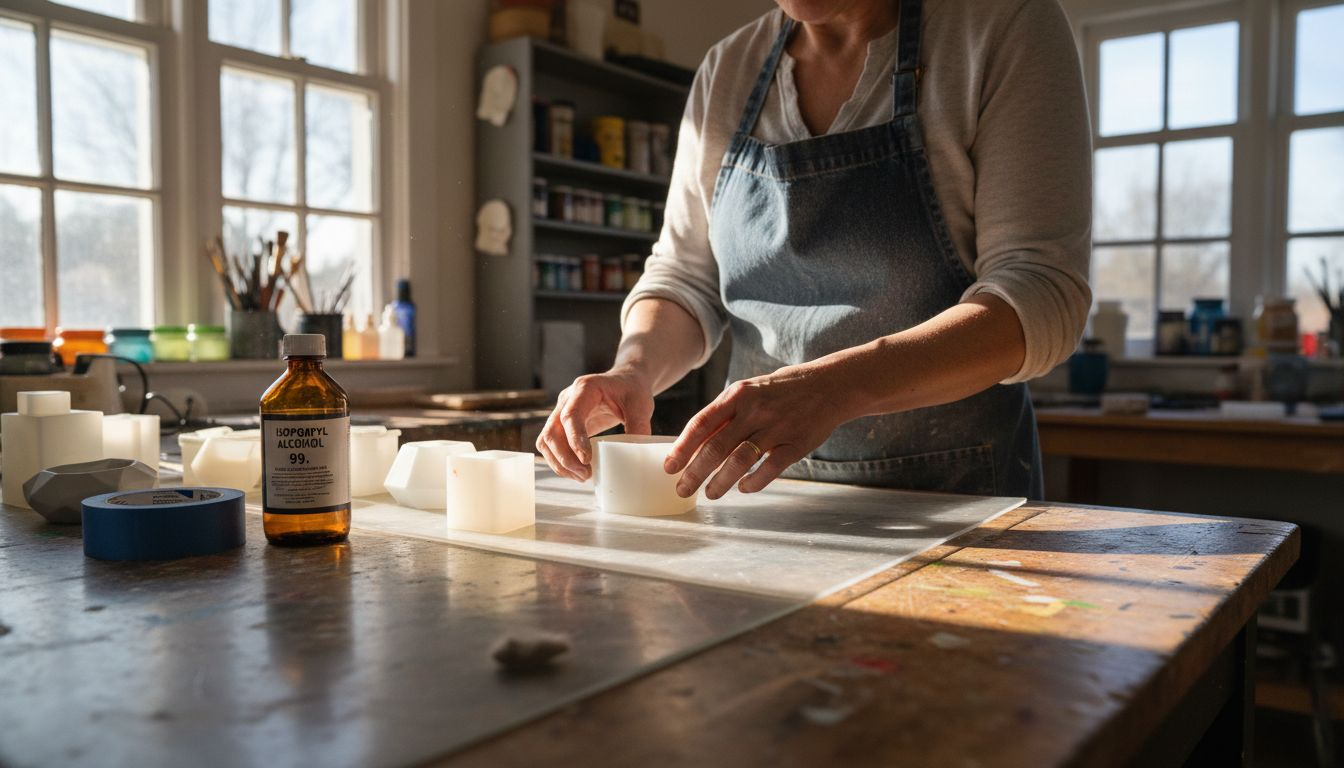
Pro tip: Always have extra clean microfiber cloths and isopropyl alcohol on hand to quickly address any unexpected surface contamination during the mold preparation process.
Step 3: Mix and Color Resin Properly
Achieving perfect resin coloration requires precision and careful technique. Understanding resin mixing fundamentals is crucial for creating professional looking art pieces with vibrant uniform color.
Start by measuring your resin and hardener components with extreme accuracy using a digital scale. Follow the manufacturer’s recommended ratio carefully pouring each component slowly to prevent air bubbles. Mix the components gently using a wooden stirring stick with long smooth strokes avoid rapid stirring which can introduce unwanted air pockets. When adding pigments or colorants incorporate them gradually mixing thoroughly to ensure even distribution. Liquid colorants work best when added in small increments allowing you to control color intensity and prevent over saturation.
Work in a well ventilated area with consistent temperature to support proper resin curing. Allow your mixed resin to sit for a few minutes after initial mixing to let any trapped bubbles rise to the surface. This resting period helps create a smoother more professional finish in your final artwork.
Pro tip: Use clear plastic cups for mixing resin and keep a separate mixing stick for each color to prevent unintended color contamination.
Step 4: Pour and Cure Resin Safely
Precision and patience are key when pouring and curing resin to achieve professional looking art pieces. Casting resin requires methodical technique to ensure a flawless final result that captures your creative vision.
Carefully position your prepared mold on a perfectly level surface to prevent uneven resin distribution. Pour the resin slowly and steadily from a low height to minimize air bubble formation. Use a toothpick or small stir stick to guide the resin into intricate mold details and help release any trapped air bubbles. If you notice surface bubbles forming gently pass a heat gun or torch several inches above the resin surface this will cause bubbles to rise and pop without damaging your artwork.
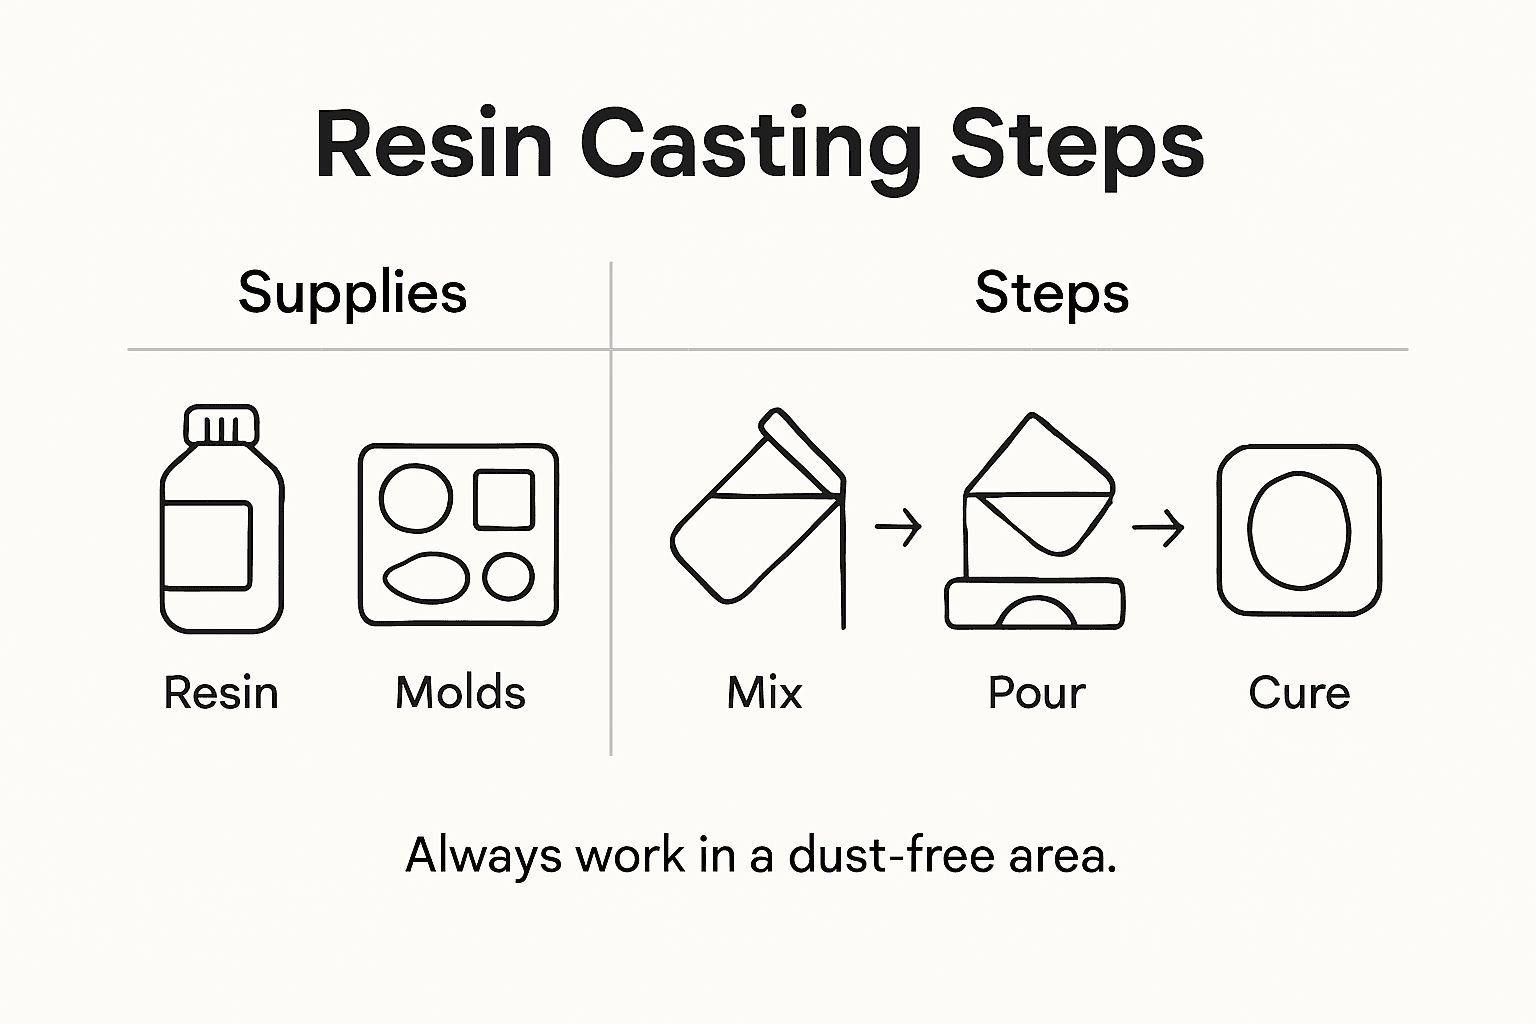
Allow your resin to cure in a dust free area with consistent room temperature between 70 to 80 degrees Fahrenheit. Avoid moving or disturbing the piece during the initial curing phase which typically takes 24 to 48 hours depending on your specific resin type. Cover the curing area with a clean cardboard box or plastic container to protect your artwork from dust particles while ensuring proper air circulation.
Pro tip: Keep a timer nearby to track exact curing times and avoid touching or moving your resin piece during the critical initial hardening phase.
Step 5: Demold and Inspect Finished Casts
The final stage of resin casting requires careful demolding and meticulous inspection to ensure your artwork meets professional standards. Proper demolding techniques are crucial for preserving both your cast and silicone mold.
Wait until your resin is completely cured before attempting to remove it from the mold. Gently flex the silicone mold away from the edges of your cast flexing slowly and evenly to prevent any tearing or stretching. If the piece seems stuck do not force it instead try placing the mold in a refrigerator for 10 to 15 minutes which can help contract the resin slightly and make demolding easier. Once removed examine your piece under good lighting looking for any air bubbles surface imperfections or uneven coloration. Small surface irregularities can often be addressed with fine grit sandpaper or polishing compounds.
After demolding clean your silicone mold thoroughly with isopropyl alcohol to remove any residue and prepare it for future use. Store molds flat in a cool dark place away from direct sunlight to prevent degradation. If you notice any minor tears or imperfections in your mold consider using mold repair solutions designed specifically for silicone casting molds to extend their usable life.
The table below summarizes critical mistakes in resin casting and how to avoid them:
Common Mistake | Resulting Problem | Prevention Tip |
Incorrect mixing ratio | Soft or sticky resin | Use a digital scale for accuracy |
Skipping mold inspection | Flawed final cast | Clean and check molds thoroughly |
Rushing the curing process | Warped or damaged pieces | Allow full curing time and cover |
Contaminated workspace | Dusty or uneven finish | Always protect the work surface |
Pro tip: Wear clean cotton gloves when handling your finished resin piece to prevent fingerprints and maintain a pristine surface finish.
Achieve Flawless Resin Casts with Expert Materials and Support
Mastering resin mold casting means overcoming challenges like precise resin mixing ratios, bubble-free pours, and perfect curing conditions. If your goals include creating stunning jewelry, home décor, or collectible figurines without stress or costly mistakes, having reliable supplies and guidance makes all the difference. The detailed workflow in this article highlights the importance of quality resin types, proper mold preparation, and patient curing for impressive results.

Take your resin art to the next level today by exploring the premium selection at Krystal Resin. From crystal-clear epoxy resins to versatile silicone molds and pigments, find everything you need to streamline your creative process. Benefit now from fast shipping options including US-based delivery for timely project starts. Don’t let common resin casting frustrations hold you back when flawless artwork is within reach. Visit Krystal Resin, shop with confidence, and turn your ideas into polished masterpieces.
Frequently Asked Questions
What are the essential supplies needed for resin mold casting?
To successfully execute resin mold casting, you need high-quality casting resin and hardener, silicone molds, mixing containers, stirring sticks, and protective gear. Gather all your materials before starting to ensure a smooth workflow and minimize interruptions.
How do I prepare and treat my resin molds for optimal results?
Begin by cleaning your silicone molds with isopropyl alcohol to remove any dust or debris. Then, apply a thin layer of mold release agent to ensure your resin piece separates smoothly after curing, maintaining the details of your mold.
What is the correct method for mixing and coloring resin?
Mix resin and hardener precisely using a digital scale for accurate measurements, following the manufacturer’s recommended ratio. Gradually add pigments while mixing to achieve an even color, and avoid rapid stirring to minimize air bubbles.
How can I ensure a flawless pour and cure process for my resin?
Pour resin slowly and from a low height to reduce air bubble formation, using a toothpick to guide it into details. Ensure the curing area is dust-free and maintain a consistent temperature between 70 to 80 degrees Fahrenheit to achieve the best results.
What steps should I take to demold and inspect my finished resin pieces?
Wait until your resin is completely cured before demolding to avoid damage. Gently flex the silicone mold to release the cast and inspect it under good lighting for imperfections, addressing any minor flaws with fine grit sandpaper if needed.
Recommended
Comments